Coach Young Athletes to Throw a Javelin in 6 Simple Steps
Get the E-Book Version Of This Post Including A Bonus Cheat Sheet
The following sequence can be used to introduce the javelin to beginners using either modified javelins (e.g. Turbojavs) or the real implement. I have used these teaching steps with class-sized groups of up to thirty children within a thirty minute session and with smaller groups and individuals.
Group Organization & Supervision
When teaching a throwing skill to large groups, ensuring the best use of the limited time available is vital. Maximizing activity time and organizing smooth transitions between activities is important if a throwing session with large numbers is to be productive. To ensure the athletes receive the maximum number of attempts, I aim to provide as many implements as possible. Therefore with a group of thirty participants, if I have fifteen implements, I will arrange it so that the athletes work in pairs, with fifteen of the group throwing at a time. (Yes it can be done safely if certain precautions are taken!)
Most of the group sessions that I have conducted to teach javelin/modified javelin occur on a large grassed area. A javelin runway is not used. The athletes simply deliver the javelins from behind a ground marker that is adequately spaced from the next thrower in line. The athletes’ partner/s stand safely at another marker at least five metres behind the throwers. All throwing is done in the same direction.
NOTE: During such an activity, good supervision skills are important. Position yourself so you can see the whole group. Stand back so that you can see everyone, but are also able to focus on individual interactions if needed. Supervision should be active and interactive, not just standing back and watching.
I have taught the following sequence using javelins or modified javelins with children between the ages of 9 and 16 years, with the younger athletes only using a modified implement. Obviously, the younger the athlete, the more simple the coach’s instructions and expectations need to be.
To avoid delays, all equipment must be set up before the session begins.
Introduction – Safety
The coach should begin the session by quickly and clearly outlining some safety parameters for the activities that will follow. Most important are:
- Throw only when instructed to do so.
- Collect only when instructed to do so.
- Throw only in a defined area and only when this area is clear.
- Carry, do not throw the javelin to return it.
If using the real implement:
- Always carry the javelin vertically with the point down.
- Be aware that the tail is as potentially dangerous as the tip.
- Never run to collect a javelin.
- Take care when removing the javelin from the ground. Check that the area around is clear before doing so.
- When the javelins are not in use, they should be firmly stuck into the ground in a vertical position.

Carry the Javelin With the Point Down
Ensure that the athletes understand that after delivering the javelins, they are to stand and wait for the signal to collect. When asked to collect the implements, they carry them back (do not throw them back) and hand them carefully to their partner.
Step 1:
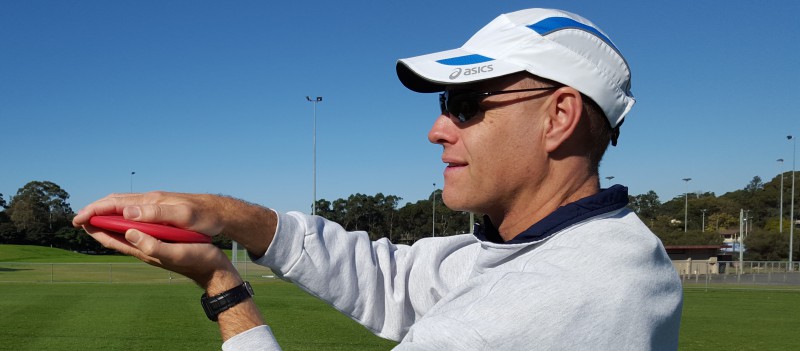
Grip
When teaching a large group, I find it is best to describe and demonstrate the javelin grip while they are all sitting/standing together in close proximity to the demonstration.
Emphasize that the javelin is held at the back of the grip, along the palm (rather than across), with fingers firmly around the implement, with at least one finger behind the binding.
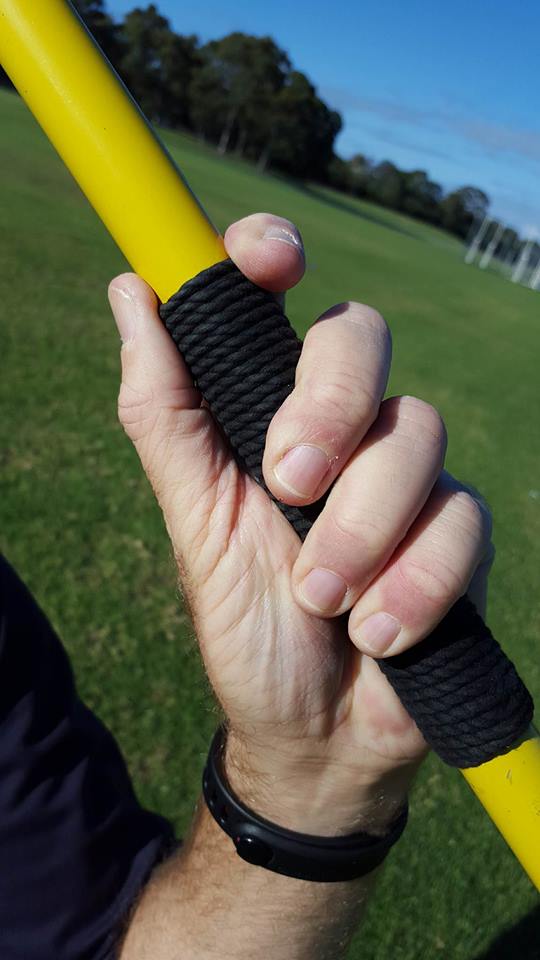
A Javelin Grip
The athletes are then organized into their throwing formation, as described above.
Step 2:
Standing Throw
Aim:
- To introduce the basic javelin throwing action.
- To teach control of the javelin.
Set Up:
Place a target, such as a hoop, 5-10m in front of each thrower. I like the idea of using a target to emphasize accuracy as it usually results in a tidier technique.
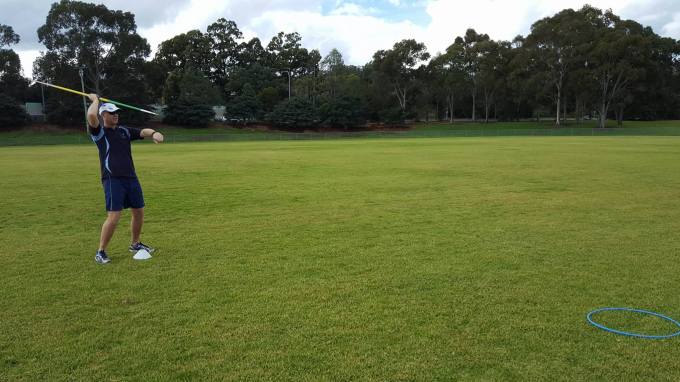
Activity:
- Stand with feet parallel, shoulder-width apart, toes pointed in the direction of the throw, body square to the target.
- The javelin is held directly above the head or throwing arm shoulder, with arm bent and elbow forward.
- The point of the javelin and the non-throwing arm should be pointed directly at the target.

Standing Javelin Throw – Starting Position
- From here, the javelin is thrown in a straight line at the target.
- The release of the javelin from the fingers should cause the javelin to rotate (clockwise for a right-hander) creating stability in flight.
- Emphasize that the tip of the javelin must always be pointing at the target throughout the entire action. Look for athletes who unwittingly lose control of the tip and wave it in all directions!
- The throwing action is a “pulling”, not a “pushing” action.
- Allow a slight withdrawal of the javelin in preparation to throw as long as the javelin remains pointing at the target during the withdrawal.
Standing Javelin Throw at Target
Skill Extension:
- Move the hoops further away from the throwers.
- Use the above arm position and throwing action, but with the foot opposite the throwing arm forward in a throwing stance. (i.e. Left foot forward for right-handed thrower). Ensure both feet are pointing in the direction of the throw.
Step 3:
Step & Throw
Aim:
Introduce an element of timing into the throw.
Set Up:
As above.
Activity:
- Start in the standing throw preparatory position, as described above.
- Keeping the javelin pointed at the target and close the head, slightly withdraw the javelin by extending the throwing arm back.
- Holding the arm back, step forward onto the foot opposite the throwing arm (i.e. a right-handed thrower steps on to the left foot).
- Throw the implement at the target by pulling it forward and through in a smooth action.
- To encourage correct timing, use the cue “step-throw”. The javelin should be held back and not pulled forward until the front foot is firmly planted on the ground.
- Ensure both feet are pointing in the direction of the throw.

Step & Throw
Step 4:
Walk & Throw
Aim:
To introduce the approach.
Set Up:
As above but throwers start a few paces back from the delivery point. Be aware that this may mean moving those athletes waiting for their turn a little further back.
Activity:
- Start in the standing throw preparatory position, as described above.
- Keeping the javelin pointed at the target and close to the head, slightly withdraw the javelin by extending the throwing arm back.
- Holding the arm back and keeping the javelin level and pointed forward, begin a walking approach of 3-5 steps.
- Stepping onto the foot opposite the throwing arm, pull the javelin through to release it.
- Emphasize control of the javelin during the approach and the delivery.
Skill Extension:
- Allow the athletes to withdraw the javelin during the approach.
- Some of the athletes may be able to attempt a quick last two steps prior delivery. The idea is to get the front foot quickly on the ground during the last stride. Therefore, the rhythm from third-last to last step will be “3…..2-1” (i.e. for a right-handed thrower: “left…..right-left”).
Step 5:
Withdraw & Throw
Aim:
To teach the athletes to throw from a withdrawn position.
Set Up:
As for the standing throw.
Activity:
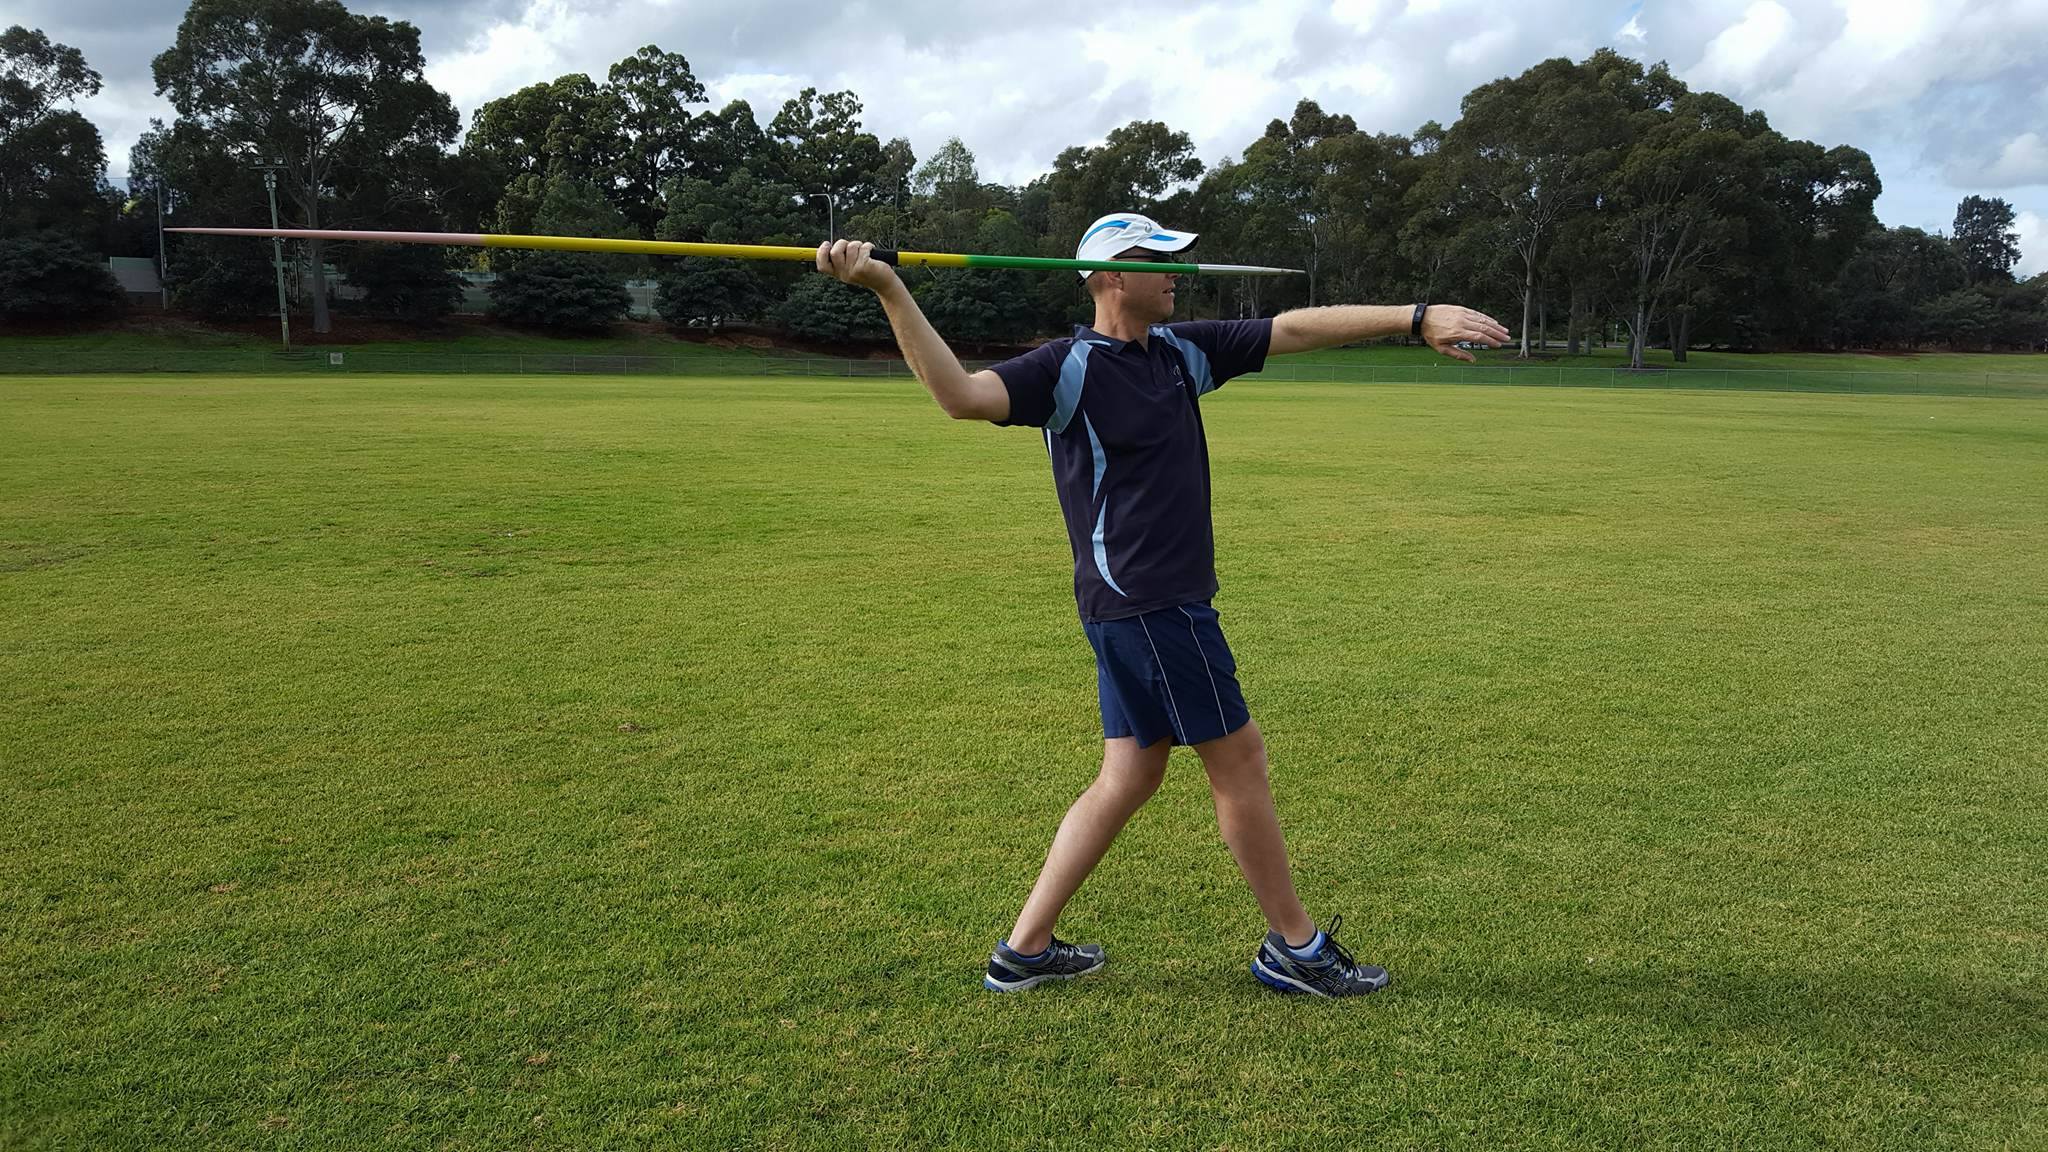
- Begin as for the standing throw with one foot forward.
- Turn the shoulders 90 degrees away from the direction of the throw.
- Extend the throwing arm back so that the hand is higher than the elbow and the elbow is level to or higher than the shoulder.
- The palm of the throwing hand should be under the javelin (“pointing to the sky”)
- Hold the javelin level along the throwing arm, with the tip pointing forward at approximately eye level.
- In a smooth, continuous action, the javelin is pulled forward and thrown over the shoulder in a “tennis-serve-like” action.
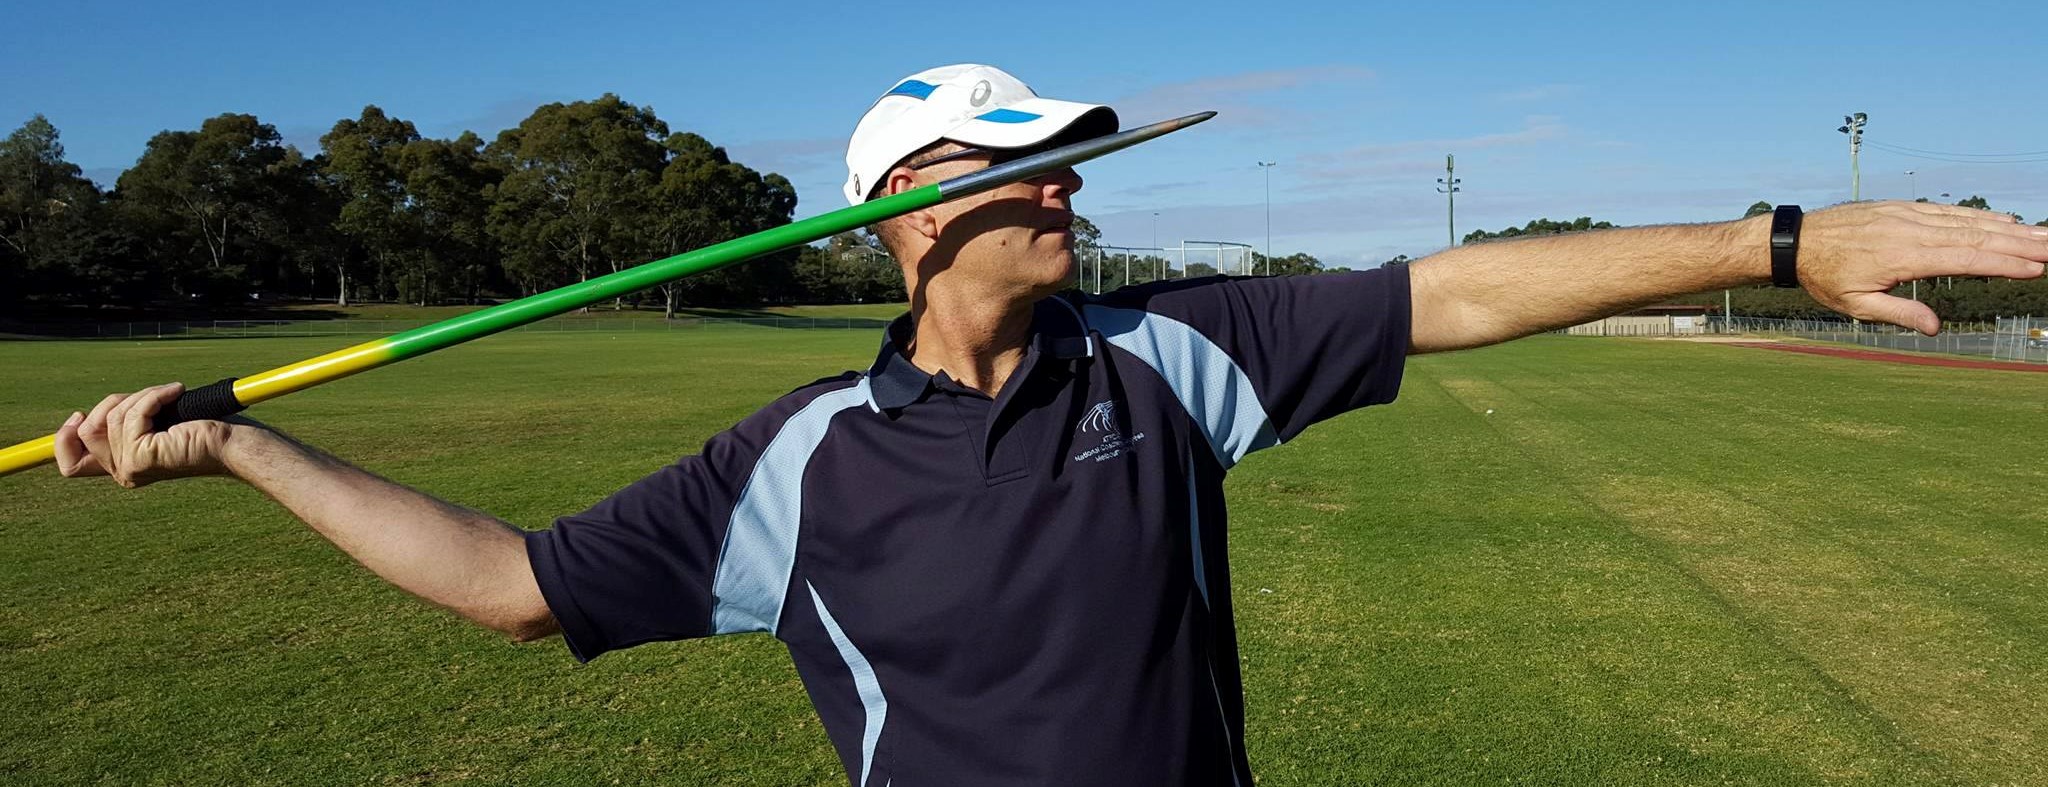
The Withdrawn Position
Skill Extension:
As before, progress the athletes through:
- A “one-step” throw
- A “walking throw”
- A walking throw with a quick last two steps.
Step 6:
a) Run & Throw – Three Steps
- A right-handed thrower will stand with the right foot forward and the right arm back, holding the javelin.
3 Step Throw – Preparatory Position
- The three steps consists of a first step onto the left foot, then a low “jump” onto the right foot and a final quick step onto the left foot into a throwing stance before pulling the javelin through.
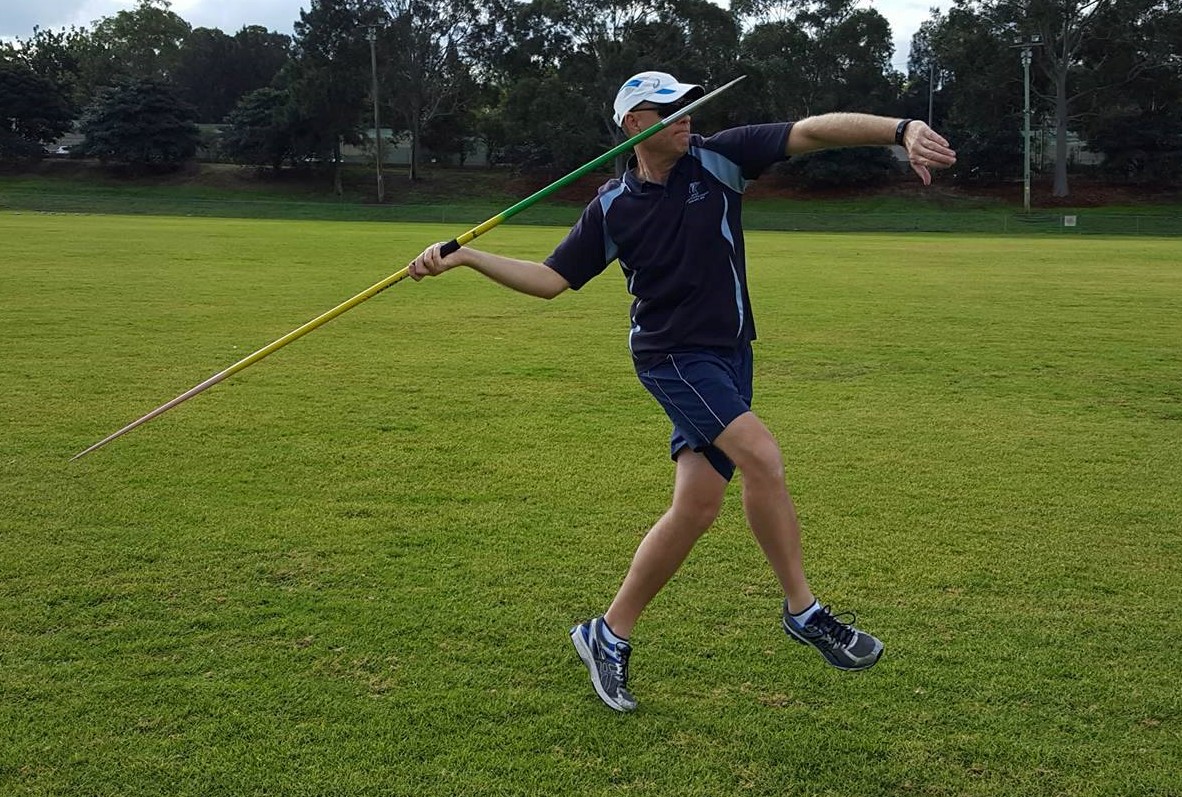
“Jumping” into the Final Stride
b) Run & Throw – Beyond Three Steps
To teach a longer run-up, the coach simply asks the athletes to add two strides at a time. i.e. A 3, 5, 7, 9 . . . etc, step run-up.
Once moving beyond a five-stride approach, athletes may wish to carry the javelin above their shoulder for a number of strides, taking the javelin back into the withdrawn position a few steps before throwing.
Do you have any tips for introducing kids to the javelin?
I would love to hear what has worked for you. Let me know if you try some of the tips that I have given above, and I am also happy to answer any questions that you have.
Further reading
Coaching Young Athletes E-Book:
How To Introduce Javelin To Young Athletes (plus bonus cheat sheet)
Articles:
10 of the Biggest Mistakes Young Athletes Make When Throwing a Javelin
A Javelin Drill That Was Inspired by the Karate Kid
How to Control the Point of the Javelin
How to Perform a Better Javelin Crossover Stride
If this post helped you please take a moment to help others by sharing it on social media. If you want to learn more I encourage you to leave questions and comments or contact me directly.

Darren Wensor is a sports development professional, coach educator, specialist coach of young athletes, and founder of the blog coachingyoungathletes.com. Learn more about him here and connect with him on Twitter, Facebook, Linkedin, or via email. Check out Coaching Young Athletes on YouTube, the Coaching Young Athletes podcast, and the Coaching Young Athletes E-Book Series.

Thanks for your tips. I encourage the pupils to say ‘I am great’ for the 3 step approach and ‘I am the great . .est’ for the 5 step approach. I find it helps them to get their feet right!
Tanya Broadbent
LikeLike
Hi Tanya. Nice idea. I think that I might have to try that one! Darren
LikeLike
[…] How to Introduce Javelin to Young Athletes […]
LikeLike
Reblogged this on The Teesra and commented:
If this works for teaching javelin (and I’m sure it does), perhaps there is something here for bowling?
I often see young cricketers struggle with “bowling from base” – they miss the all-important rotation from a basically side-on base to front-on release when there is no inherent forward motion.
I’ll have to try this out – perhaps starting from “withdraw & throw”…with a straight arm, of coirse!
LikeLike
Thanks for sharing.
And the other important factor is that using the suitable safe javelin for kids training and practicing.
LikeLike
Certainly. I am a big fan of using modified javelins with novices. The Turbojav is my favourite. Thanks for your comment. Darren
LikeLike