Coach Young Athletes to Long Jump in 3 Easy Steps
Get The E-Book Version Of This Post Including A Bonus Cheat Sheet
The following sequence of activities can be used to teach long jump to beginners. I have used these teaching steps with class-sized groups of up to thirty children within a thirty minute session and with smaller groups during coaching clinics.
The skills included are generally applicable to 5-12 year-olds, but of course how much you can get through in one session and the language and instructions you use will differ across the age groups.
Group Organization
Teaching long jump to a large group presents a number of organizational problems for the coach. Long jump is an activity that is potentially low in activity time. Generally there is only one landing area that must be shared among the entire group. Thus the coach must look for ways to keep the group active and engaged, and allow each athlete as many jumps as possible in the time available.
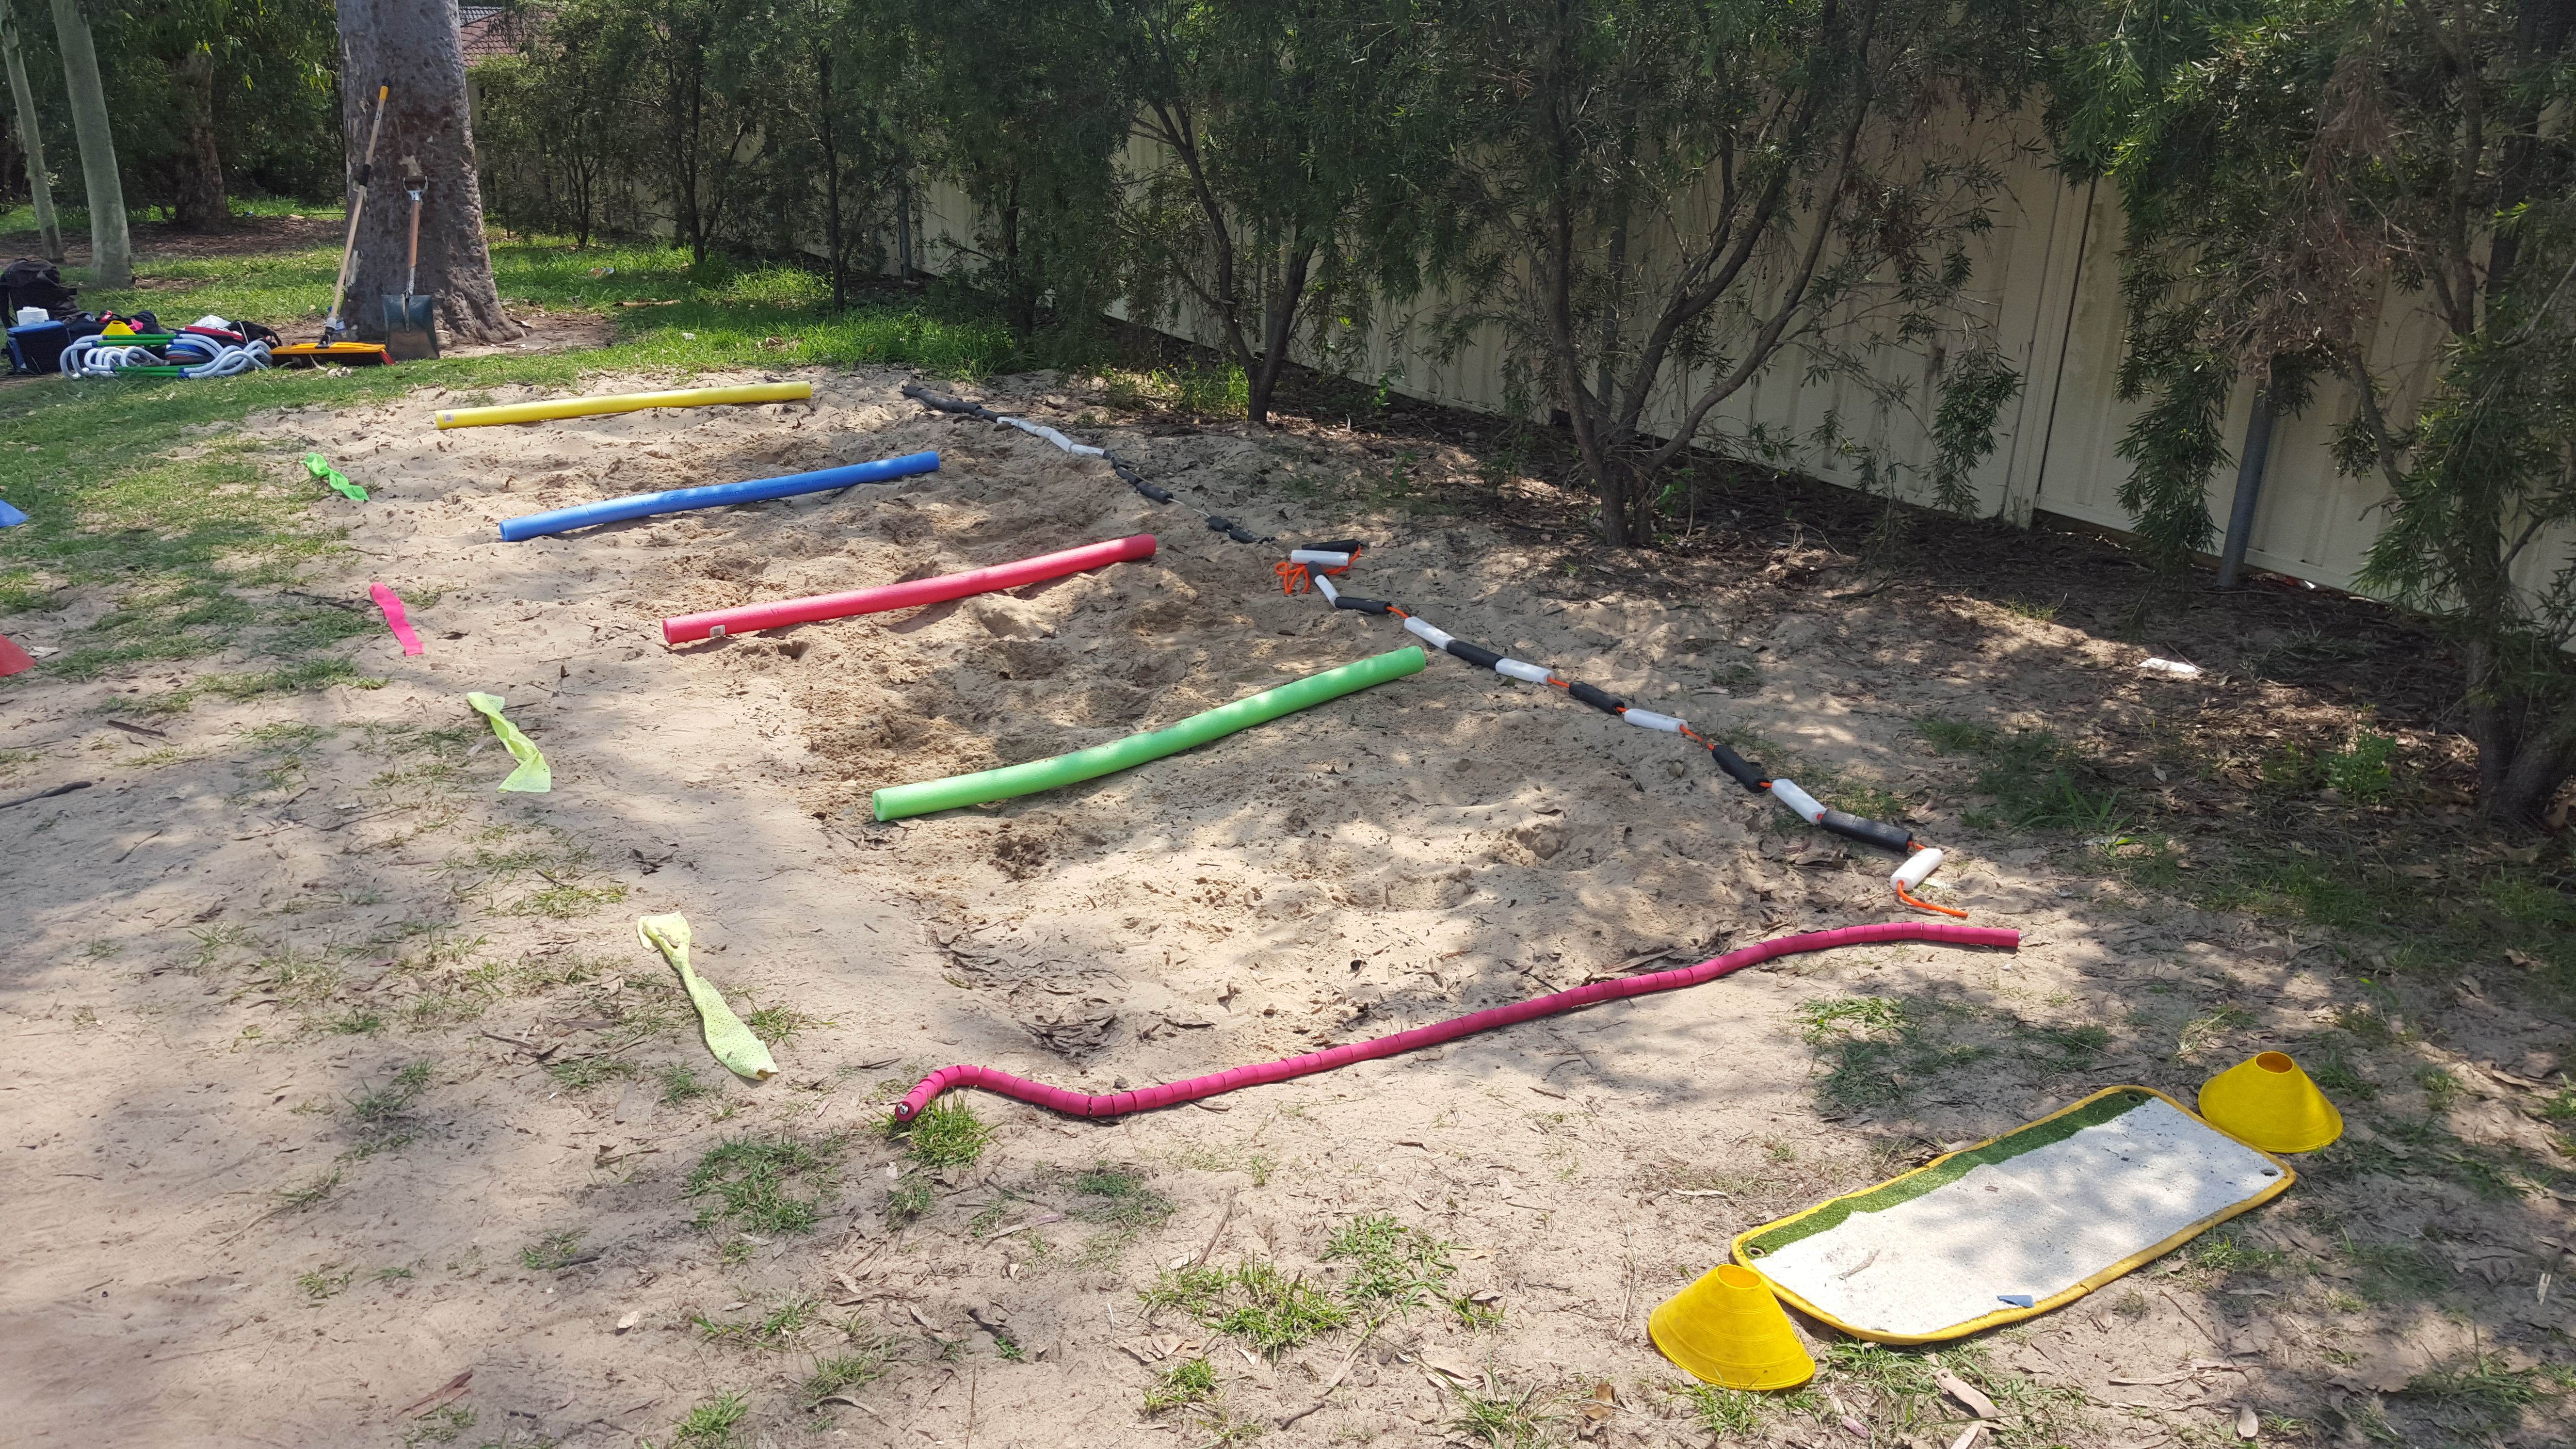
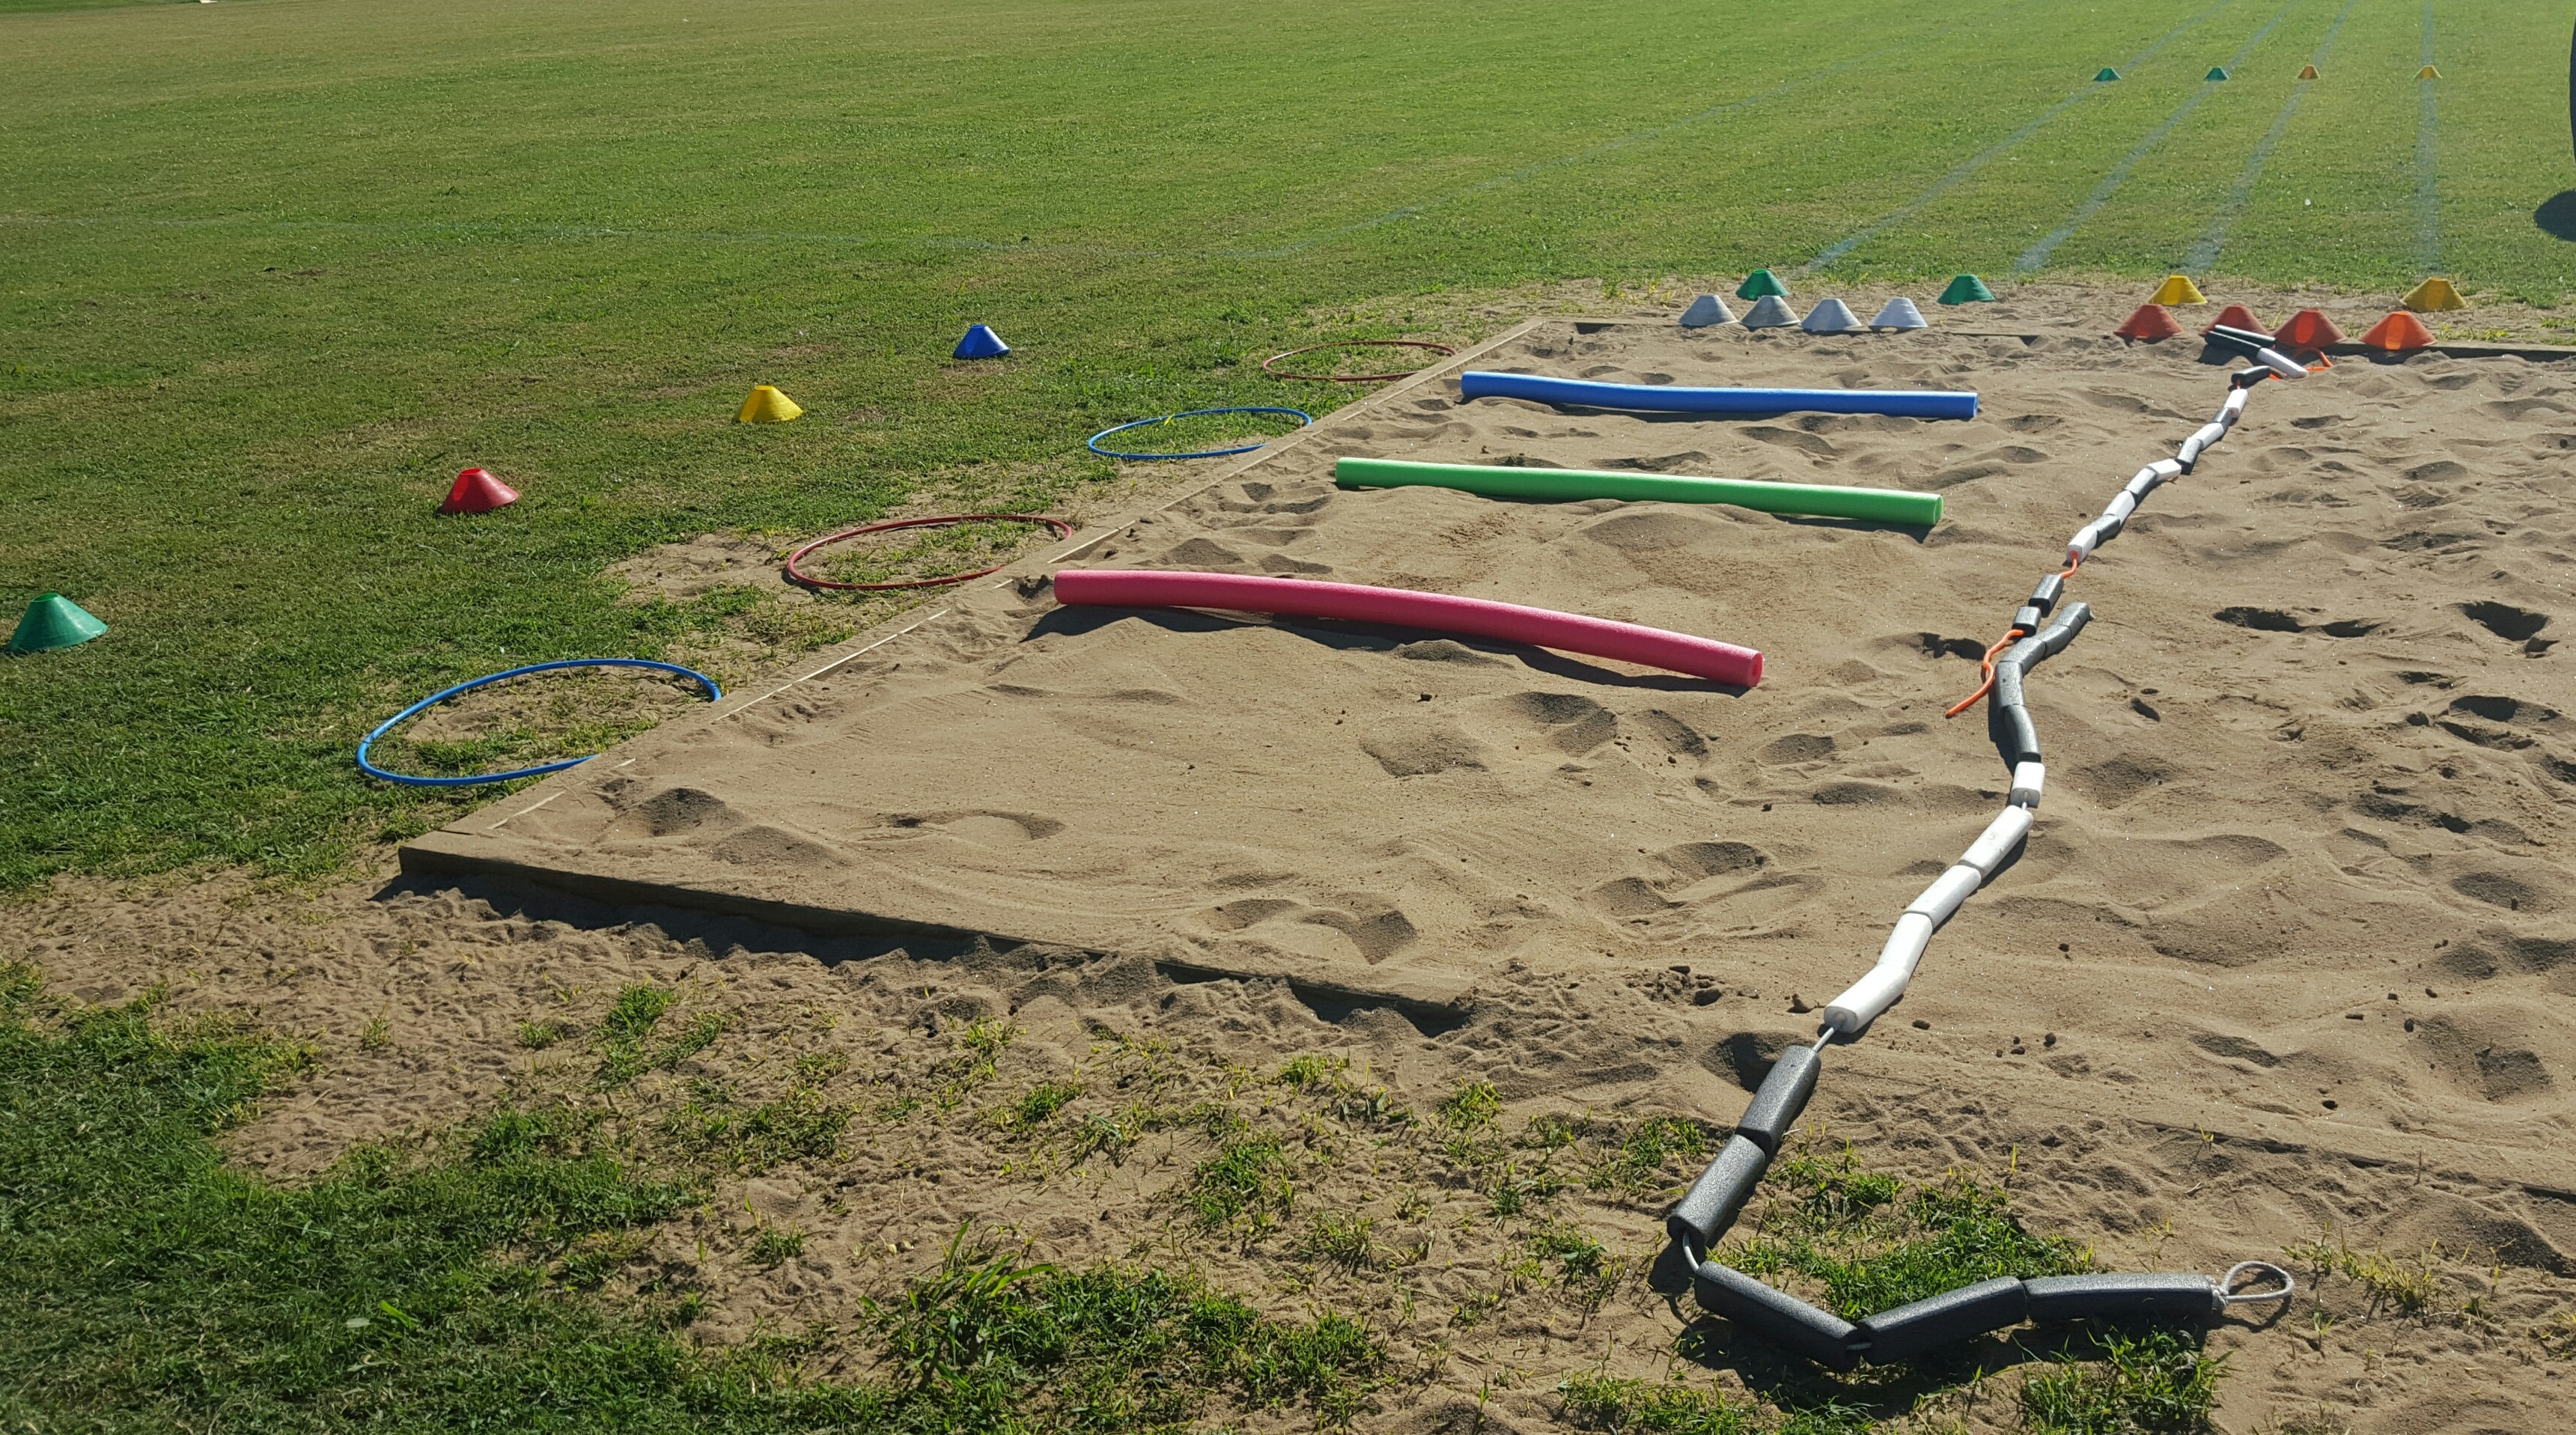
Where possible, I usually begin each of my sessions with the athletes performing jumping skills from the side of the pit. I will organise the children in up to five evenly spaced lines along the side of the pit. In this situation up to five children can jump into the pit at the same time. In addition, with a class of up to thirty children, having five lines of six children is far preferable to one line of thirty children. A lesser number of lines may have to be used, depending on the length of the sand pit.
In doing the above:
- The pit must be deemed wide enough by the coach to safely allow jumping skills to be performed across it.
- The surface along the side of the pit must be stable and flat enough to allow a safe take-off.
- The athletes should be organised so that they are only performing the skills off a few steps; this will help to prevent the athletes from jumping too far and possibly jumping OVER the pit!
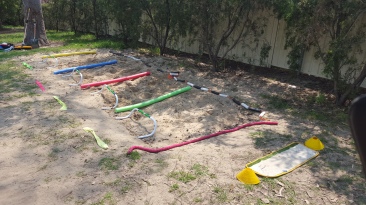
- There should be sufficient space in the pit and between jumpers to allow safe landings without collisions. (The coach may have to emphasize this by dividing the pit into individual landing areas. I usually place a coloured ground marker on the other side of the pit that the athletes are asked to jump towards – this helps the athletes to jump in a straight line and keep out of each other’s way. Recently I have used pool noodles to divide the pit into multiple smaller long jump landing areas.
- I tend not to use hoops as targets for the athletes to land in. If an athlete lands on the edge of a hoop, the hoop can flick up and trip or hit the athlete).
- To further lessen the possibility of the athletes jumping OVER the pit, I lie ribbons or high jump elastic bars across the point I do not want them to jump past. i.e. The jumpers must land BEFORE the ribbon/high jump elastic bar.
Of course, if working with a much smaller group (i.e. 6 or less athletes), none of the above may be necessary; all activities can be done one at a time on the runway, jumping into the pit as normal.
Step 1:
Standing long jump into the pit.
Aim:
- To give the athletes confidence in safely landing in the pit.
- To teach a safe two-foot landing.
- To teach the athletes how to use their arms to assist the distance of the jump.
Set Up:
The athletes line up in groups along the side of the pit behind ground markers. A hoop may be placed at the head of each line to designate from where the athletes must jump.
Activity:
The athletes perform a standing long jump into the sand pit. They briefly pause in their landing position, then quickly move out the way to allow the next person in line to safely jump.
- Teach the athletes to take off from two feet and land on two feet.
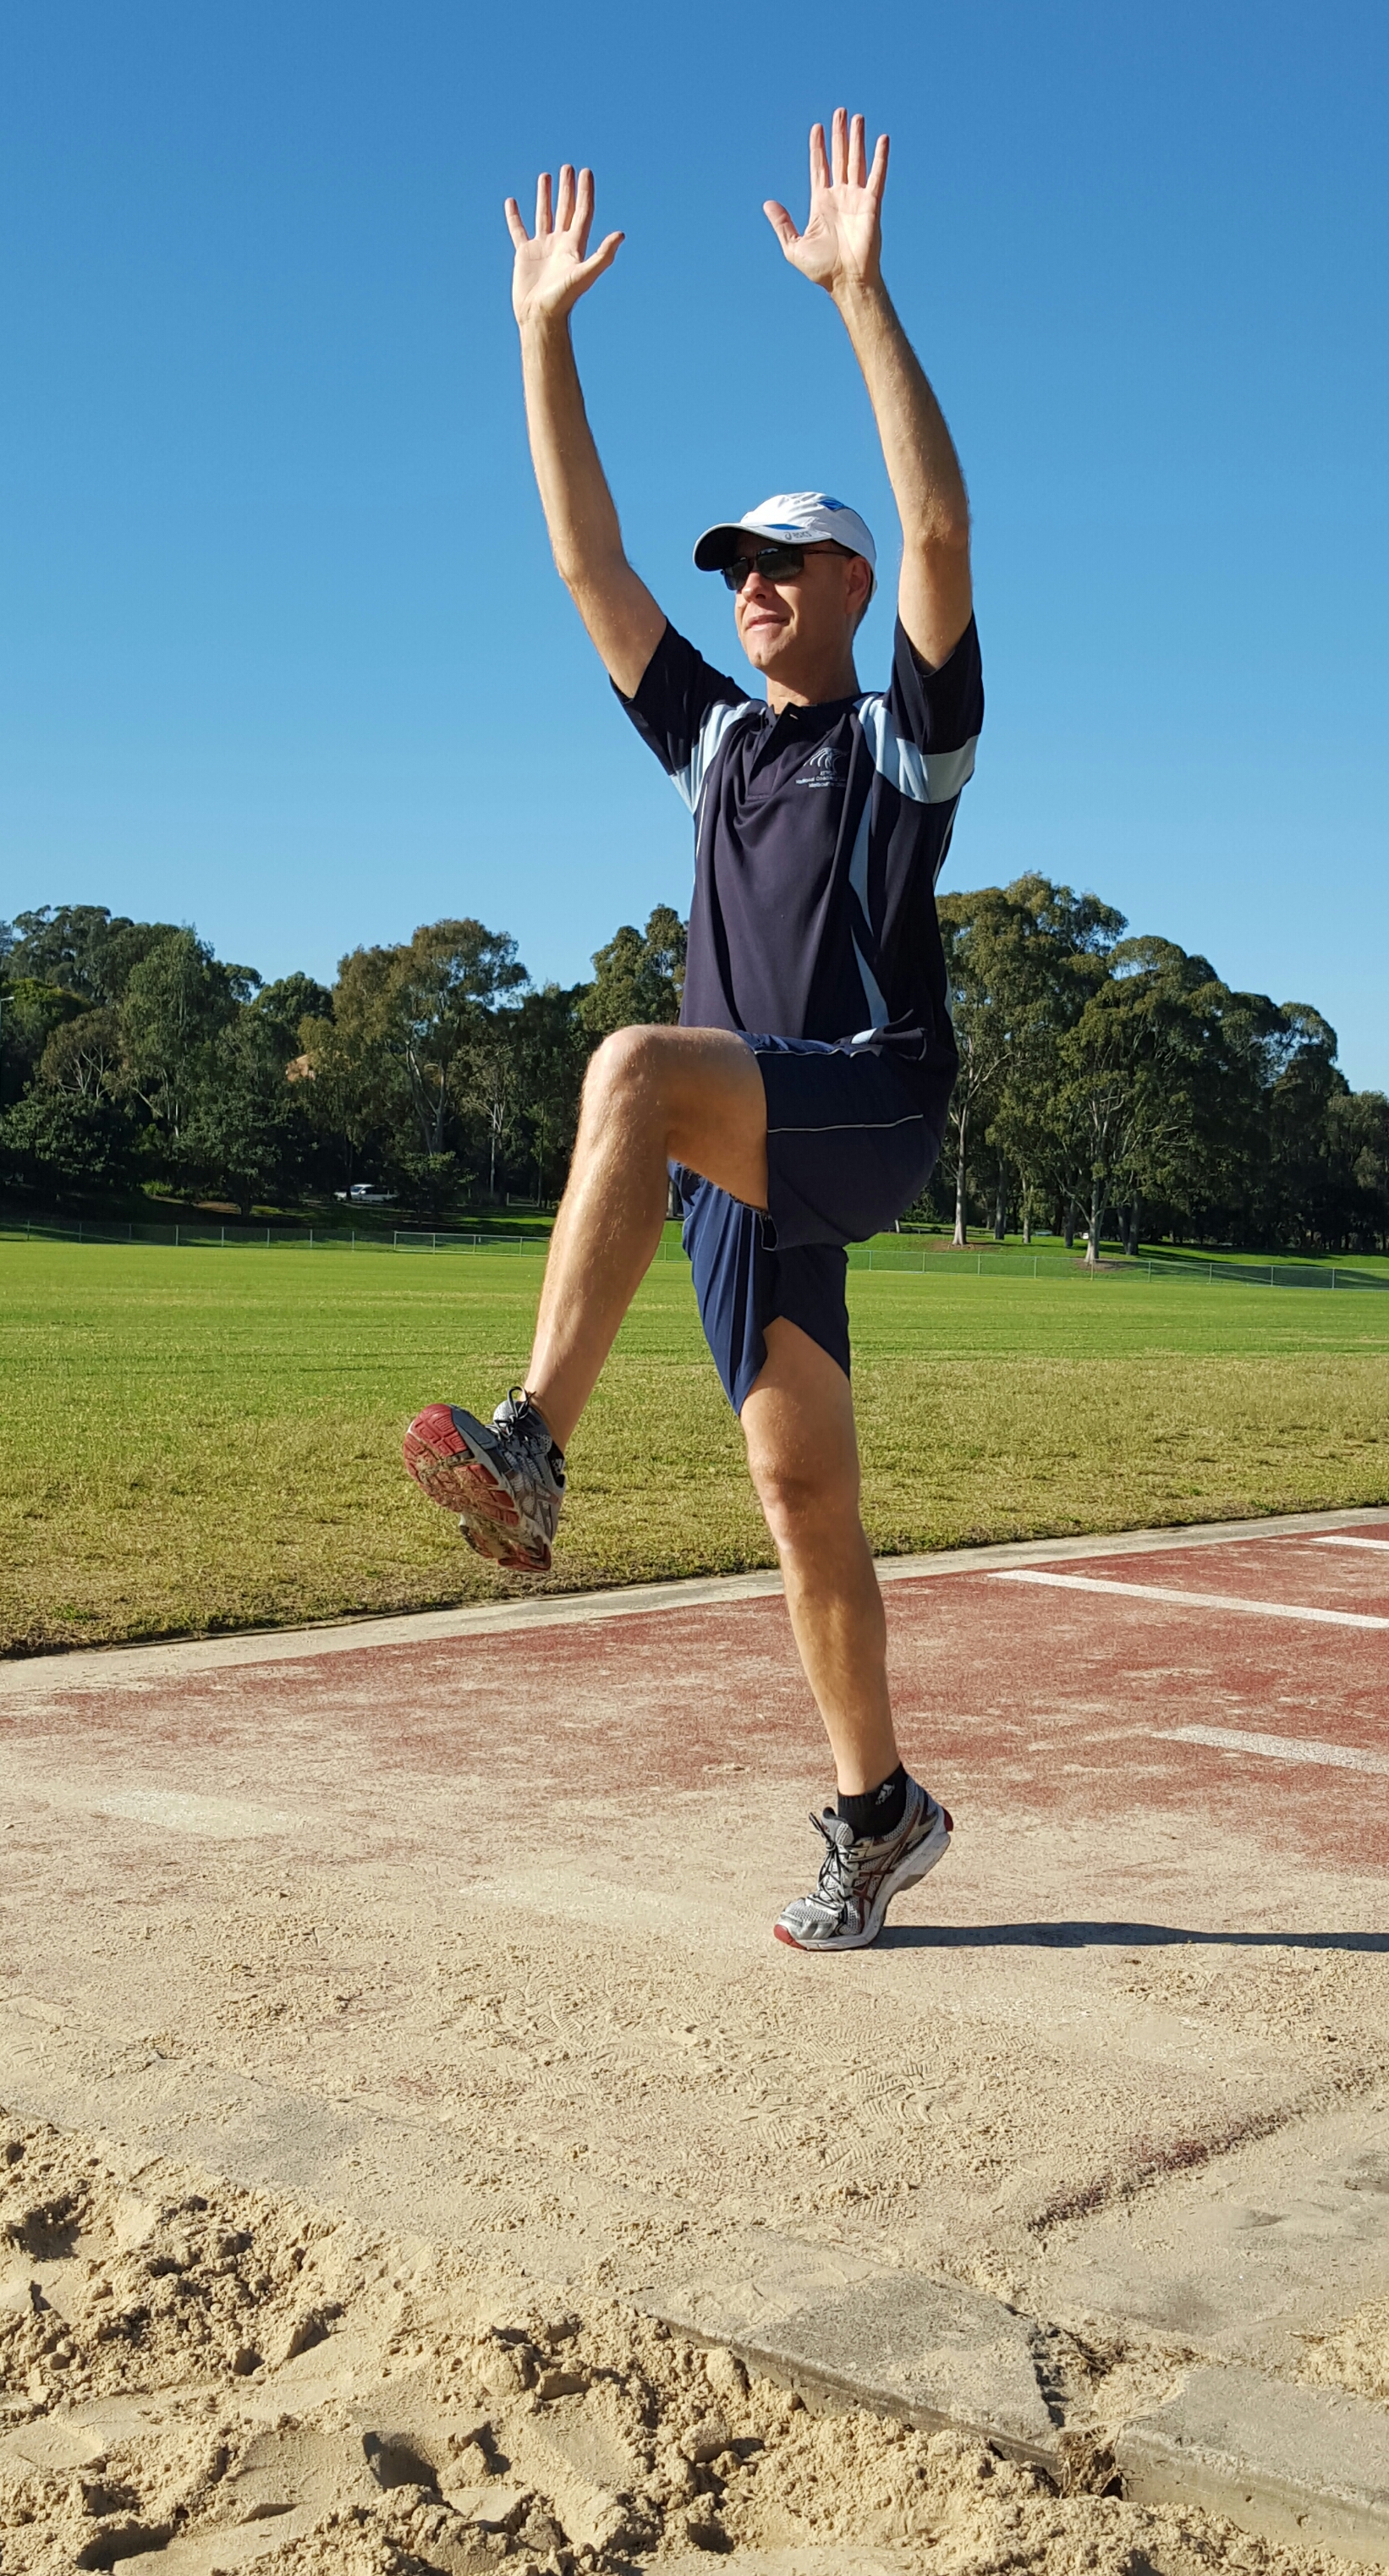
- Teach the athletes to bend their legs and swing their arms back when preparing to take off; to “stretch out” whilst in the air; and to “land like a frog” with bent legs in the sandpit. A simple coaching cue is: “Bend, stretch, bend”. (You may be amazed at how many of the athletes cannot coordinate this action).
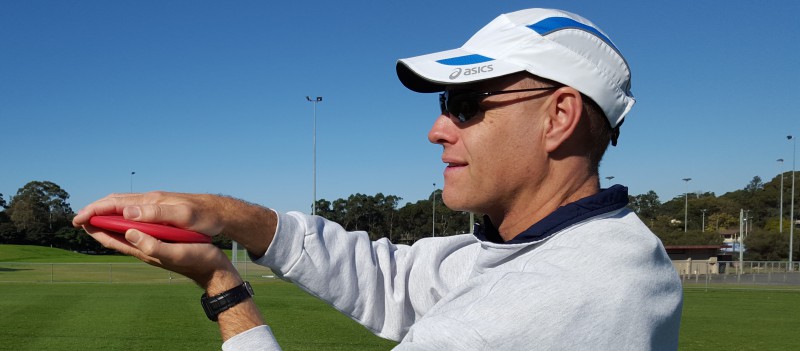
- Tell the athletes to swing their arms forward and up on take-off. Asking them to clap their hands above their heads whilst in the air can be a fun way to teach this movement. Alternatively, ask them to imagine that they are “jumping up and swinging on monkey bars” or “jumping up to swing on a trapeze“.
- Teach the athletes to land with their feet close together and at the same time. (“Make one noise, not two when you land.”)
- Watch for those athletes who land with straight, stiff legs in the sandpit/and or bend forward at just the hips, rather than at the knees. Encourage a “head up – bottom down” landing rather than a “head down – bottom up landing”. Asking them to “make hand-prints in the sand” next to their feet or to “grab the sand” near their feet is also effective in helping them to achieve a more correct landing position.
NOTE:
- Ensure that the athletes do not jump until you have given the signal.
- Try to keep the group moving through quickly, but make sure that the pit is clear before you give the signal for the next athletes to have their turn.
Skill Extensions
- Draw a line in the sand that the athletes have to attempt to jump over i.e. “Jump the River”.
- If I have time I sometimes teach the athletes to perform a standing long jump off one foot, with two feet landing in the sand. This can be a good but not vital skill link to the next activity.
Step 2:
Jump into the pit from a short approach – one foot to two feet.
Aim:
To introduce the basic long jump action using a one-foot take-off and two-feet landing.
Set Up:
As above, but this time the athletes line up further back from the edge of the pit to allow an approach of a few steps.
Activity:
On the coach’s signal, the athletes jog/run at an easy pace in towards the edge of the pit and jump by taking off from one foot and landing on two feet in the sand. With a younger or less-skilled group, the coach may have to instruct the athletes to begin with a walking or 1-step approach.
- Ensure that the athletes take-off from one foot and land with two feet together in the pit.
- Watch for those athletes who take-off from two feet.
- Encourage the athletes to use the same landing technique as that used for the standing long jump activity – “land like a frog”.
- Watch for those athletes who simply step or run into the pit and continue running through the sand. Instructing the athletes to “land like a frog” and to come to a complete stop on landing can help to fix this problem.
- Once athletes master a one-foot-take-off-two-feet-landing technique, remind them of the use of their arms. Asking them to pretend to run, jump and swing on the “monkey bars” or “trapeze” then to land “like a frog” and “make hand-prints” or “grab the sand” will result in quite a good basic long jump technique.
- If the athletes are jumping very flat and barely getting off the ground ask them to “spring” or “pop” up and “push off their toes” when they take-off.
Jump to swing on a trapeze.
Skill Extensions:
- The athletes need to learn to take off accurately from a designated take-off area. Continue with the above activity, but ask the athletes to run in and take off from one foot placed in a hoop positioned at the edge of the pit. Be prepared for this to totally confuse some of the athletes who have had little long jump experience. Watch for a variety of errors such as taking off from two feet in the hoop, skipping into the hoop, jumping/stepping over the hoop, etc. Reverting to a walking approach may be required for some.
With or without the athletes taking off from the hoop as described above:
- Draw a line in the sand that the athletes need to attempt to jump past i.e. “Jump the River” or two lines that the athletes need to land between i.e. “Jump into the River”.
- Place a low object such as a mini hurdle at the edge of the pit that the athletes must attempt to jump over.
Step 3:
Long jump for distance from a longer approach.
Aim:
To allow the athletes to attempt the full long jumping action from a longer approach run.
Set Up:
The athletes line up on the long jump runway behind a marker placed approximately ten metres from the pit. (With beginners I find that no more than 10 metres is required. For some 5-7 year-olds, even a little less of a run-up can be appropriate and can also save time). The coach marks out a long jump take-off area on the runway in front of the pit. (Where possible, I like to use a 1m x 1m non-slip/pegged-in mat for beginners, regardless of their age).
Activity:
One at a time, and only on the coach’s signal, the athletes run in and perform a long jump for distance into the pit.
- Continue to reinforce all of the coaching points outlined for the previous activity.
- Encourage the athletes to run fast on the runway.
Add a fun game and competitive element by playing “Long Jump Legends”. Award points or “labels” according to the distance jumped, designated by coloured markers placed next to the pit or lines drawn in the sand. E.g.
- 1st distance = 1 point (Place this where it is achievable for everyone)
- 2nd distance = 2 points
- 3rd distance = 3 points
- 4th distance = 4 points (Make this one difficult!)
- Foul jump = 0 points
(If using the above point score, the coach may decide to introduce a team competition).
OR
- 1st distance = “Legend”
- 2nd distance = “Super Legend”
- 3rd distance = “The Legendest Legend in Legend Land”
NOTE:
For supervision purposes, when I am working with a large group, I only send one group (i.e. 5-6 individuals) at a time to line up on the runway. The rest of the group remains sitting or standing in their lines next to the pit, where they can applaud, help judge or perform warm-up activities. Once an athlete jumps, he/she takes up their place next to the pit again. This keeps the majority of the group under good supervision near the coach, prevents a long line-up on the runway, and allows the group to hear the coach’s feedback to each athlete after they jump. The coach may also ask the group questions about what an athlete did well or not so well, and teach the group about various long jump rules as they witness others jumping.
Skill extensions:
- With or without the above scoring system, place a low, safe object such as a mini hurdle at the edge of the pit for the athletes to jump over. Alternatively, ask two “helpers” to hold up a flexible elastic high jump bar at an appropriate height for the athletes to jump over.
- Decrease the size of the take off area/mat until it is the regulation size for the particular age group.
- Allow longer run ups. For tips on how to teach kids to measure a long jump run up, see How to Teach a Long Jump Run-Up in 7 Easy Steps.
A very basic long jump technique can be taught within a 30 minute session. As with most skill teaching, the keys include being organized, keeping the athletes as active as possible, and using logical teaching progressions that are appropriate for the age and skill level of the athletes.
Summary
Teach kids to long jump by using the following steps:
1. Standing long jumps into the pit – 2 feet to 2-feet jumps
Cues:
- “Bend, stretch, bend”
- “Land with one noise”
- “Head up, bottom down”
Extensions:
- Jump the river
- Standing jump from one foot
2. Long jump into the pit from a short approach
Cues:
- Swing on the trapeze
- Land like a frog
- Make hand prints in the sand
Progressions:
- One step approach (stepping into hoop)
- Walking approach
- Jogging approach
Extensions:
- Jump the river
- Jump over an obstacle
3. Long jump for distance from a longer approach (runway)
- Play “Long Jump Legends”
This article has been adapted and updated from an article by the author that first appeared in “Modern Athlete and Coach”, Volume 48, No. 3, July 2010
Do you have any tips for introducing kids to the long jump?
I would love to hear what has worked for you when teaching/coaching long jump to beginners. Let me know if you try some of the tips that I have given above, and I am also happy to answer any questions that you have.
Click Here To Get The E-Book Version Of This Post Including A Bonus Cheat Sheet
Further Reading
Articles:
10 of the Biggest Mistakes Young Athletes Make in the Long Jump
How to Teach a Long Jump Run-Up in 7 Easy Steps
How a Sand Wall Can Help Kids to Long Jump Further
Teach Young Long Jumpers to Swing on a Trapeze
If this post helped you please take a moment to help others by sharing it on social media. If you want to learn more I encourage you to leave questions and comments or contact me directly.

Darren Wensor is a sports development professional, coach educator, specialist coach of young athletes, and founder of the blog coachingyoungathletes.com. Learn more about him here and connect with him on Twitter, Facebook, Linkedin, or via email. Check out Coaching Young Athletes on YouTube, the Coaching Young Athletes podcast, and the Coaching Young Athletes E-Book Series.

[…] How to Teach Young Athletes to Long Jump […]
LikeLike
Hey this is great and just what I need for my 5-7 year old children. Thanks
LikeLike
Excellent! Thanks for the feedback. I’m glad that I could be of help. Darren
LikeLike
I’ve used this entire lesson structure with 9-12 year olds at the primary school where I teach PE. It is sequential, sensible and engaging for students: they are appropriately busy.
LikeLike