Spin to Win: How to Set Up an Effective Turn in the Discus
A common mistake I see when young athletes attempt a rotational discus throw is that they lose control by turning too fast too soon. Many young athletes attempt to rotate quickly without establishing balance first. They lose balance and over-rotate. They are unable to complete an effective blocking action in the delivery position. They will often fall away to their non-throwing arm side and lose control of the discus release.
Generating momentum in discus throwing requires a gradual build-up from a solid foundation. Rushing the initial rotation hinders the thrower’s ability to control momentum and execute an effective throw. A sound technique starts from the ground up.
Take Control From The Start
One of the best ways to counter this problem is to get the kids to slow down and better control their rotation at the beginning of the movement.
The rotation aims to achieve momentum on the discus, but this momentum can only be capitalised on if the discus is delivered from a balanced position and an effective discus flight is achieved. One way of achieving this is to initially slow down and prevent the non-throwing arm from being “thrown away” in an over-rotating action.
Let’s consider a right-handed discus thrower standing at the rear of the circle about to begin a full one-and-a-half rotation. Their back is facing the throwing direction. They are are are facing away from the landing sector.
After the initial wind-up, the athlete begins to rotate. They should do this by pivoting on their left foot until it turns 180 degrees to point in the direction of the throw. This first foot pivot should set the athlete up to move in a controlled, strong, and balanced movement across the circle.
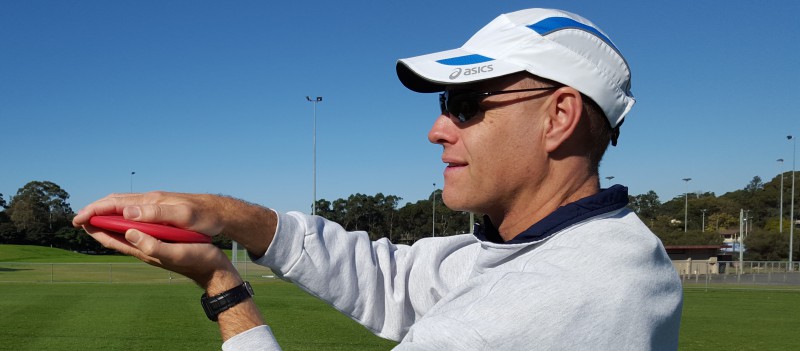
Once the pivoting left foot points toward the landing sector, the chin and knee should be locked in above the foot. This can be achieved by asking the athlete to pretend they are looking at a watch on their left wrist as they rotate (I have also heard coaches tell athletes to look through the fingers of their left hand). This prevents the arm and head from being thrown away and leading the rotation. Keeping the wrist (or fingers) within view holds the arm back. Once they lock themselves into a chin, knee, and toe alignment and are looking out at the landing sector, they can continue their pivot in a linear direction. This sees them drive across the circle to land the other foot in the middle of the ring.

Learning the Movement
It is worth practicing the initial rotation in isolation. Ask athletes to perform the 180-degree pivot and then stop in the locked-in position. Tell them to put the other foot down for balance at the end of the movement. This drill can be done either in or away from a discus circle. It can be done with or without an object in the hand. It is not strenuous and can be repeated multiple times. This practice helps in ingraining the correct techniques, which can then be applied during an actual throw with a discus.
The key is going from “slow to fast” through the full rotation. Slowly winding up stores energy. Locking the foot, knee, wrist, and chin in alignment through the “wristwatch” cue helps to maintain balance on the pivot. This controlled motion sets up for a smooth acceleration across the ring to deliver the discus.
Mastering the rotational discus throw requires a deliberate and controlled approach from the very start. Young athletes must focus on establishing balance and controlling their rotation before attempting to generate momentum. By emphasising a gradual build-up of energy and a focused, controlled pivot, athletes can set themselves up for a smooth and effective throw. Practicing the initial rotation in isolation, using the “wristwatch” cue, and then gradually accelerating through the full rotation can help athletes achieve a balanced and powerful discus delivery.
Frequently Asked Questions
Mastering the rotational discus throw can be challenging for young athletes. To help reinforce the key concepts and techniques discussed in the article, I’ve compiled five frequently asked questions. These FAQs will provide additional clarity to the article.
1. Why is it important to slow down the initial rotation in a discus throw?
Slowing down the initial rotation helps to establish balance and control. This prevents over-rotation and ensures that the athlete can generate momentum effectively, leading to a more powerful and accurate throw.
2. What are the benefits of the “wristwatch” cue during the pivot?
The “wristwatch” cue helps athletes keep their non-throwing arm in check, preventing it from being thrown away and leading the rotation. This maintains balance and alignment, setting up a controlled pivot and a strong foundation for the throw.
3. How can practicing the 180-degree pivot in isolation improve a discus thrower’s technique?
Practicing the 180-degree pivot in isolation allows athletes to focus on balance and proper alignment without the complexity of a full throw. This helps in mastering the initial movement, which is crucial for building up controlled momentum and ensuring a successful throw.
4. How does a gradual build-up of energy benefit a discus throw?
A gradual build-up of energy allows the athlete to maintain control and balance throughout the throw. This controlled acceleration ensures that the maximum momentum is applied to the discus at the right moment, leading to a more powerful and accurate throw.
5. What role does the left foot play in the initial rotation for a right-handed thrower?
For a right-handed thrower, the left foot acts as the pivot point during the initial rotation. Proper pivoting on the left foot helps in setting up a balanced and controlled movement across the circle, which is essential for an effective throw.
Take the Quiz!
Now that you’ve read about the key techniques and common mistakes in mastering the rotational discus throw, it’s time to test your understanding! This quiz is designed to reinforce the concepts discussed in the article and help you evaluate your grasp of the material. Take a few moments to answer the following questions and see how well you’ve absorbed the tips and strategies for achieving a balanced and effective discus throw. You’ll find the answers at the end of the quiz.
1. What is the aim of the rotation in a discus throw?
- a) To look impressive
- b) To achieve momentum on the discus
- c) To distract the opponent
- d) To increase the weight of the discus
2. Which foot should a right-handed discus thrower pivot on during the initial rotation?
- a) Right foot
- b) Left foot
- c) Both feet simultaneously
- d) Neither foot
3. What position should the left foot be in after the initial pivot for a right-handed thrower?
- a) Pointing backward
- b) Pointing sideways
- c) Pointing in the direction of the throw
- d) Pointing at the non-throwing arm
4. What is a useful visual cue to help athletes maintain balance during the pivot?
- a) Looking at their right hand
- b) Looking at their left wrist as if checking a watch
- c) Looking at their feet
- d) Looking at the coach
5. What is the key progression in the speed of movement during the full rotation?
- a) Fast to slow
- b) Slow to fast
- c) Consistently fast
- d) Consistently slow
Answers:
- b) To achieve momentum on the discus
- b) Left foot
- c) Pointing in the direction of the throw
- b) Looking at their left wrist as if checking a watch
- b) Slow to fast
Further Reading
How To Teach Discus To Young Athletes E-Book (plus bonus cheat sheet) by Coaching Young Athletes
If this post helped you please take a moment to help others by sharing it on social media. If you want to learn more I encourage you to leave questions and comments or contact me directly.

Darren Wensor is a sports development professional, coach educator, specialist coach of young athletes, and founder of the blog coachingyoungathletes.com. Learn more about him here and connect with him on Twitter, Facebook, Linkedin, or via email. Check out Coaching Young Athletes on YouTube, the Coaching Young Athletes podcast, and the Coaching Young Athletes E-Book Series.
Click here to subscribe for free to the Coaching Young Athletes email list and receive a complimentary mini e-book!
Love what you have read? Behind every article on Coaching Young Athletes lies hours of dedication and passion. Click below to make a one-off donation and help keep the blog going strong. Your generosity makes a difference, no matter the size. Thank you for your support!
Choose an amount
Your contribution is appreciated.
Donate