Tips For Teaching The Discus Turn
This article outlines some initial steps for introducing kids to some vital skills required for the rotational discus throw.
When To Introduce The Rotation?
You can begin to work on related fundamental movement skills such as balancing, rotating, pivoting, etc, at any time. Kids will have a much better chance of successfully learning the rotational throw if they have a well-established platform of related fundamental movement skills.
However, I wouldn’t seriously try to transition a young thrower to a rotation until they can consistently deliver an effective standing throw. Too often I see kids being rushed to advanced skills before nailing down the basics.
An effective standing throw should demonstrate :
- Balance and composure
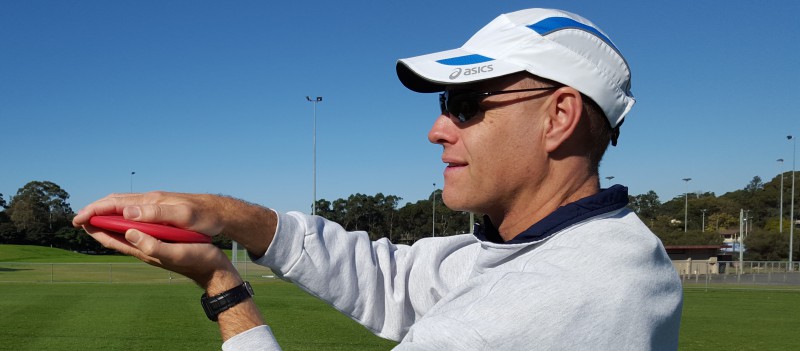
- Confidence in handling the discus
- A controlled discus release and flight
- Repeatability (No flukes accepted!)
In very simple terms, the rotational discus throw is virtually a standing throw preceded by a rotation. The effectiveness of the throw is anchored in the ability to hit a good delivery position. A delivery position that is unbalanced and haphazard wastes all that has come before it.
If a child can’t display the core positions of a basic standing throw, there is no way that they will be able to do so on exiting a rotation with momentum.
When you are convinced that the child has established a good basic working model for a standing throw, it is time to consider teaching the rotation.
Teaching The Discus Turn
One of the limiting factors of progressing to a rotational discus throw is a child’s ability to pivot cleanly on the ball of the foot while maintaining balance.
This is the very first thing that I teach.
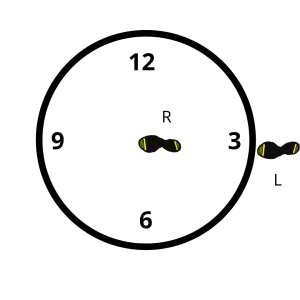
My favourite activity involves getting the kids to imagine that they are pivoting on the face of a clock. I use chalk to mark a clock on a concrete surface. You can use a discus circle, but you definitely don’t have to. The numbers on the clock face make excellent external cues towards which to orientate the feet.
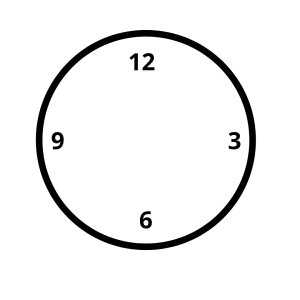
12 o’clock signifies where the front of a discus circle would be and therefore the intended direction of a throw. 6 o’clock indicates the back of the circle.
90-Degree Pivot
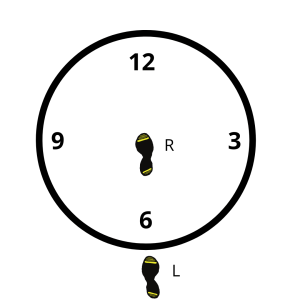
I suggest starting kids with a 90-degree pivot. The following instructions are for a right-handed thrower.
The kids:
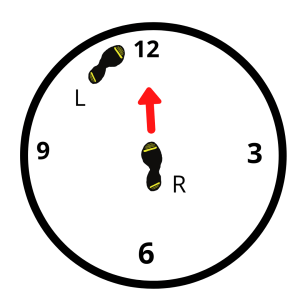
1. Put the ball of their right foot in the middle of the clock facing their foot to 12 o’clock. With hands on hips, they place their weight over the pivot foot by leaning their chin above their knee and their knee above their toe. The left leg is extended behind at approximately 6 o’clock.
NOTE: I usually draw a circle smaller than a standard discus ring, therefore you will notice in the images below that one foot is often starting outside of the circle – something not allowed in formal discus competitions!)
2. Keep their hands on their hips and their weight over the pivot foot, while they slightly raise their left foot off the ground. In one smooth motion they rotate anti-clockwise on the ball of their right foot until they turn 90 degrees and the pivot foot and body end up facing to 9 o’clock.
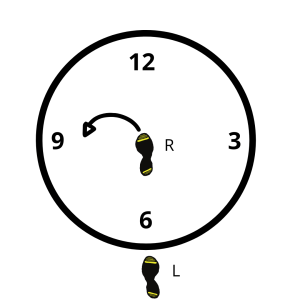
This can be repeated after going back to the starting position or the kids can work their way around the circle in a series of 90-degree pivots, pausing between each movement.
What You Want To See
- A smooth movement.
- A pivot on the ball of the foot; no rocking back on the heel.
- The weight remaining over the pivot foot (i.e. Chin-knee-toe).
- The foot leading the action. (i.e. It turns first). It is common for kids to try to initiate the turn with their upper body.
Once an acceptable level of competency is achieved with this activity, the child can progress to anti-clockwise turns of 180 degrees (to 6 o’clock), 270 degrees (to 3 o’clock) and a full 360 degrees (back to 12 o’clock).
Further Progressions
The next step focuses on landing and immediately pivoting on the ball of the foot – a crucial discus rotation skill.
A right-handed thrower would start as below. The movement, as shown by the arrow, involves:
- Stepping/leaping onto the middle of the clock with the right foot.
- Touching down with the right foot pointing around to 6 o’clock and the heel to 12 o’clock.
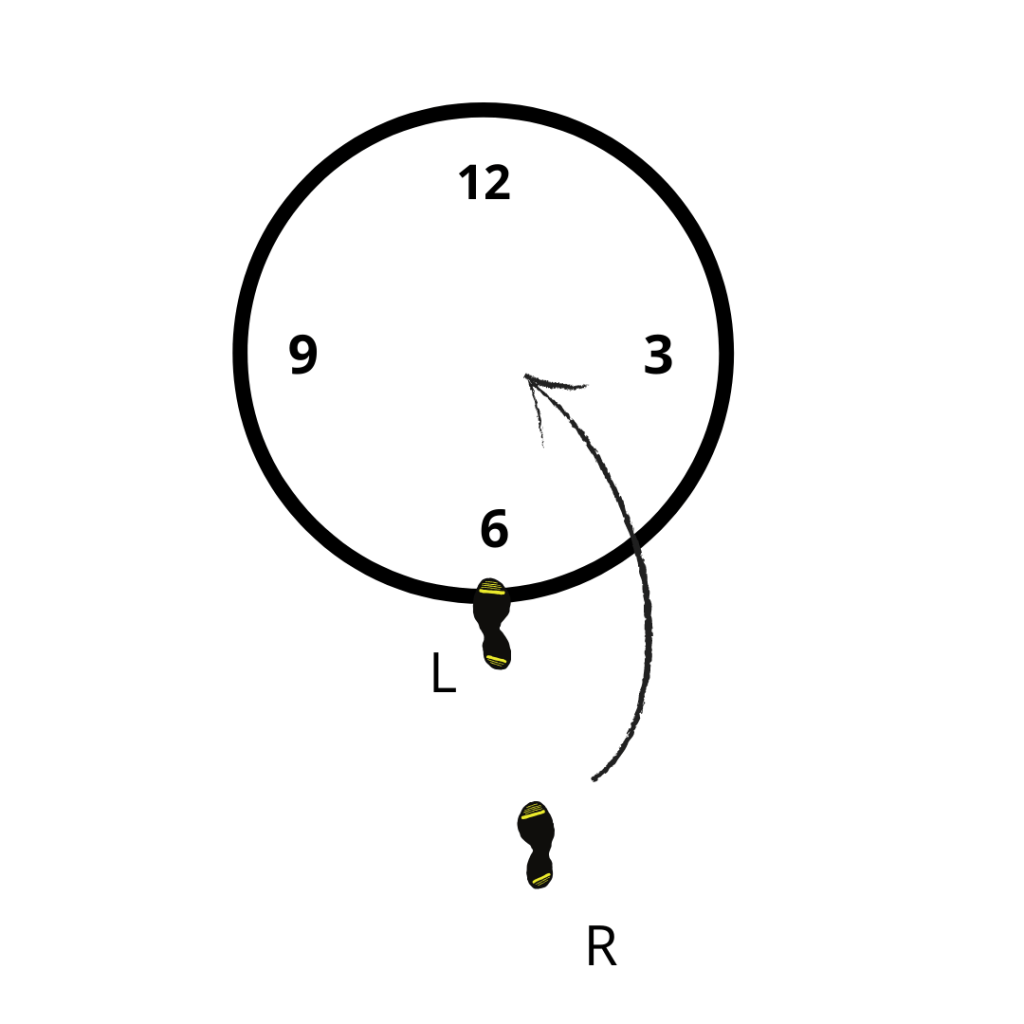
- The right foot immediately pivoting around until it points to 12 o’clock.
- The left foot planting at the top of the clock near 12 o’clock.
On achieving this, the kids are basically performing a 1 1/4 rotation, which is often used as a modified introductory discus turn.
What You Want To See
- A smooth, continuous movement.
- Staying on the balls of the feet; no rocking back on the heels.
- The right foot pointing around to 6 o’clock, heel to 12 o’clock when it touches down. It is common for kids to first touch down with their foot pointed at 12 o’clock. This means that the right foot will need to pivot a full 360 degrees to achieve the desired position at top of the clock – a very difficult skill.
- The right foot pivoting as soon as it touches down in the middle of the clock. It is common for kids to get their foot “stuck” when when they land, leaving it pointed at 6 o’clock as they try to turn their upper body to 12 o’clock.
Using an Implement
To build up to the use of an implement, I suggest that the kids perform the above activities holding (but not releasing!) an object in their throwing hand that they will not risk dropping or having to juggle. Appropriate items include a rubber ring/quoit or a small towel. When doing this, ensure that the kids keep the object trailing their body in an “arm last” action.
If the kids can:
- Confidently pivot on the balls of their feet over 1 1/4 rotations while;
- Holding an object in their throwing hand trailing behind their body until they reach the top of the clock;
it is probably time to head to the discus circle and try releasing a discus from a 1 1/4 rotation. (Recommended to only be done from inside a throwing cage!)
The child should be well on their way to being able to perform basic rotational discus throw.
Over To You!
The next time you are faced with helping a youngster learn to rotate in the discus, try some of the above suggestions. I would love to hear how it goes. You can let me know by leaving a reply/comment or by using the contact details below.
Further reading
How to Teach Discus to Young Athletes E-Book by Coaching Young Athletes
If this post helped you please take a moment to help others by sharing it on social media. If you want to learn more I encourage you to leave questions and comments or contact me directly.

Darren Wensor is a sports development professional, coach educator, specialist coach of young athletes, and founder of the blog coachingyoungathletes.com. Learn more about him here and connect with him on Twitter, Facebook, Linkedin, or via email. Check out Coaching Young Athletes on YouTube, the Coaching Young Athletes podcast, and the Coaching Young Athletes E-Book Series.
