7 Simple Steps to a Standing Discus Throw
Get The E-Book Version Of This Post Including A Bonus Cheat Sheet
I developed the following sequence to teach a basic standing discus throwing action to class-size groups of up to thirty children within a thirty to forty minute session. I have used the same sequence to introduce discus to small groups and also individuals.
Organisational Considerations
When teaching a skill to a large group, it is vital to ensure the best use of the limited time available. Maximising activity time and organising smooth transitions between activities are both important if a discus session with large numbers is to be productive.
To ensure that the athletes receive the maximum number of attempts, I aim to provide enough equipment so that at least half of the group is discus throwing at once. Therefore, with a group of thirty kids, I will arrange it so that the athletes work in pairs with fifteen of the group throwing at once.
Venue & Set Up
Most of the group sessions that I have conducted to teach discus occur on a large grassed area. Throwing circles or cages are not used. The athletes simply deliver the discuses from behind a marker placed at least two metres (for modified soft rubber discuses) or five metres (for the proper implement) along from the adjacent thrower. The athletes’ partners stand safely at another marker at least five metres behind the throwers.
Supervision
During such an activity, good supervision is important. Position yourself so that you can see the whole group, but also so you can focus on individual interactions if needed. Supervision should be active and interactive, not just standing back and watching.
Implements
I have taught the following sequence using discuses or modified training discuses with children between the ages of five and twelve years.
Safety Instructions
The coach should begin the session by quickly and clearly outlining some safety parameters for the activities that will follow. Most important are:
- DO NOT throw the discus until told to do so.
- DO NOT retrieve the discus until told to do so.
Ensure that the athletes understand that after delivering the discus, they are to wait for the signal to collect. When asked to collect the discus, they carry them back (they do not roll or throw them back) and place them on the ground ready for their partner to use.
Step 1:
The Grip
When teaching a large group, I find that it is best to describe and demonstrate the discus grip while the athletes are all sitting together in close proximity to the demonstration.
Activity
Instruct and demonstrate the following:
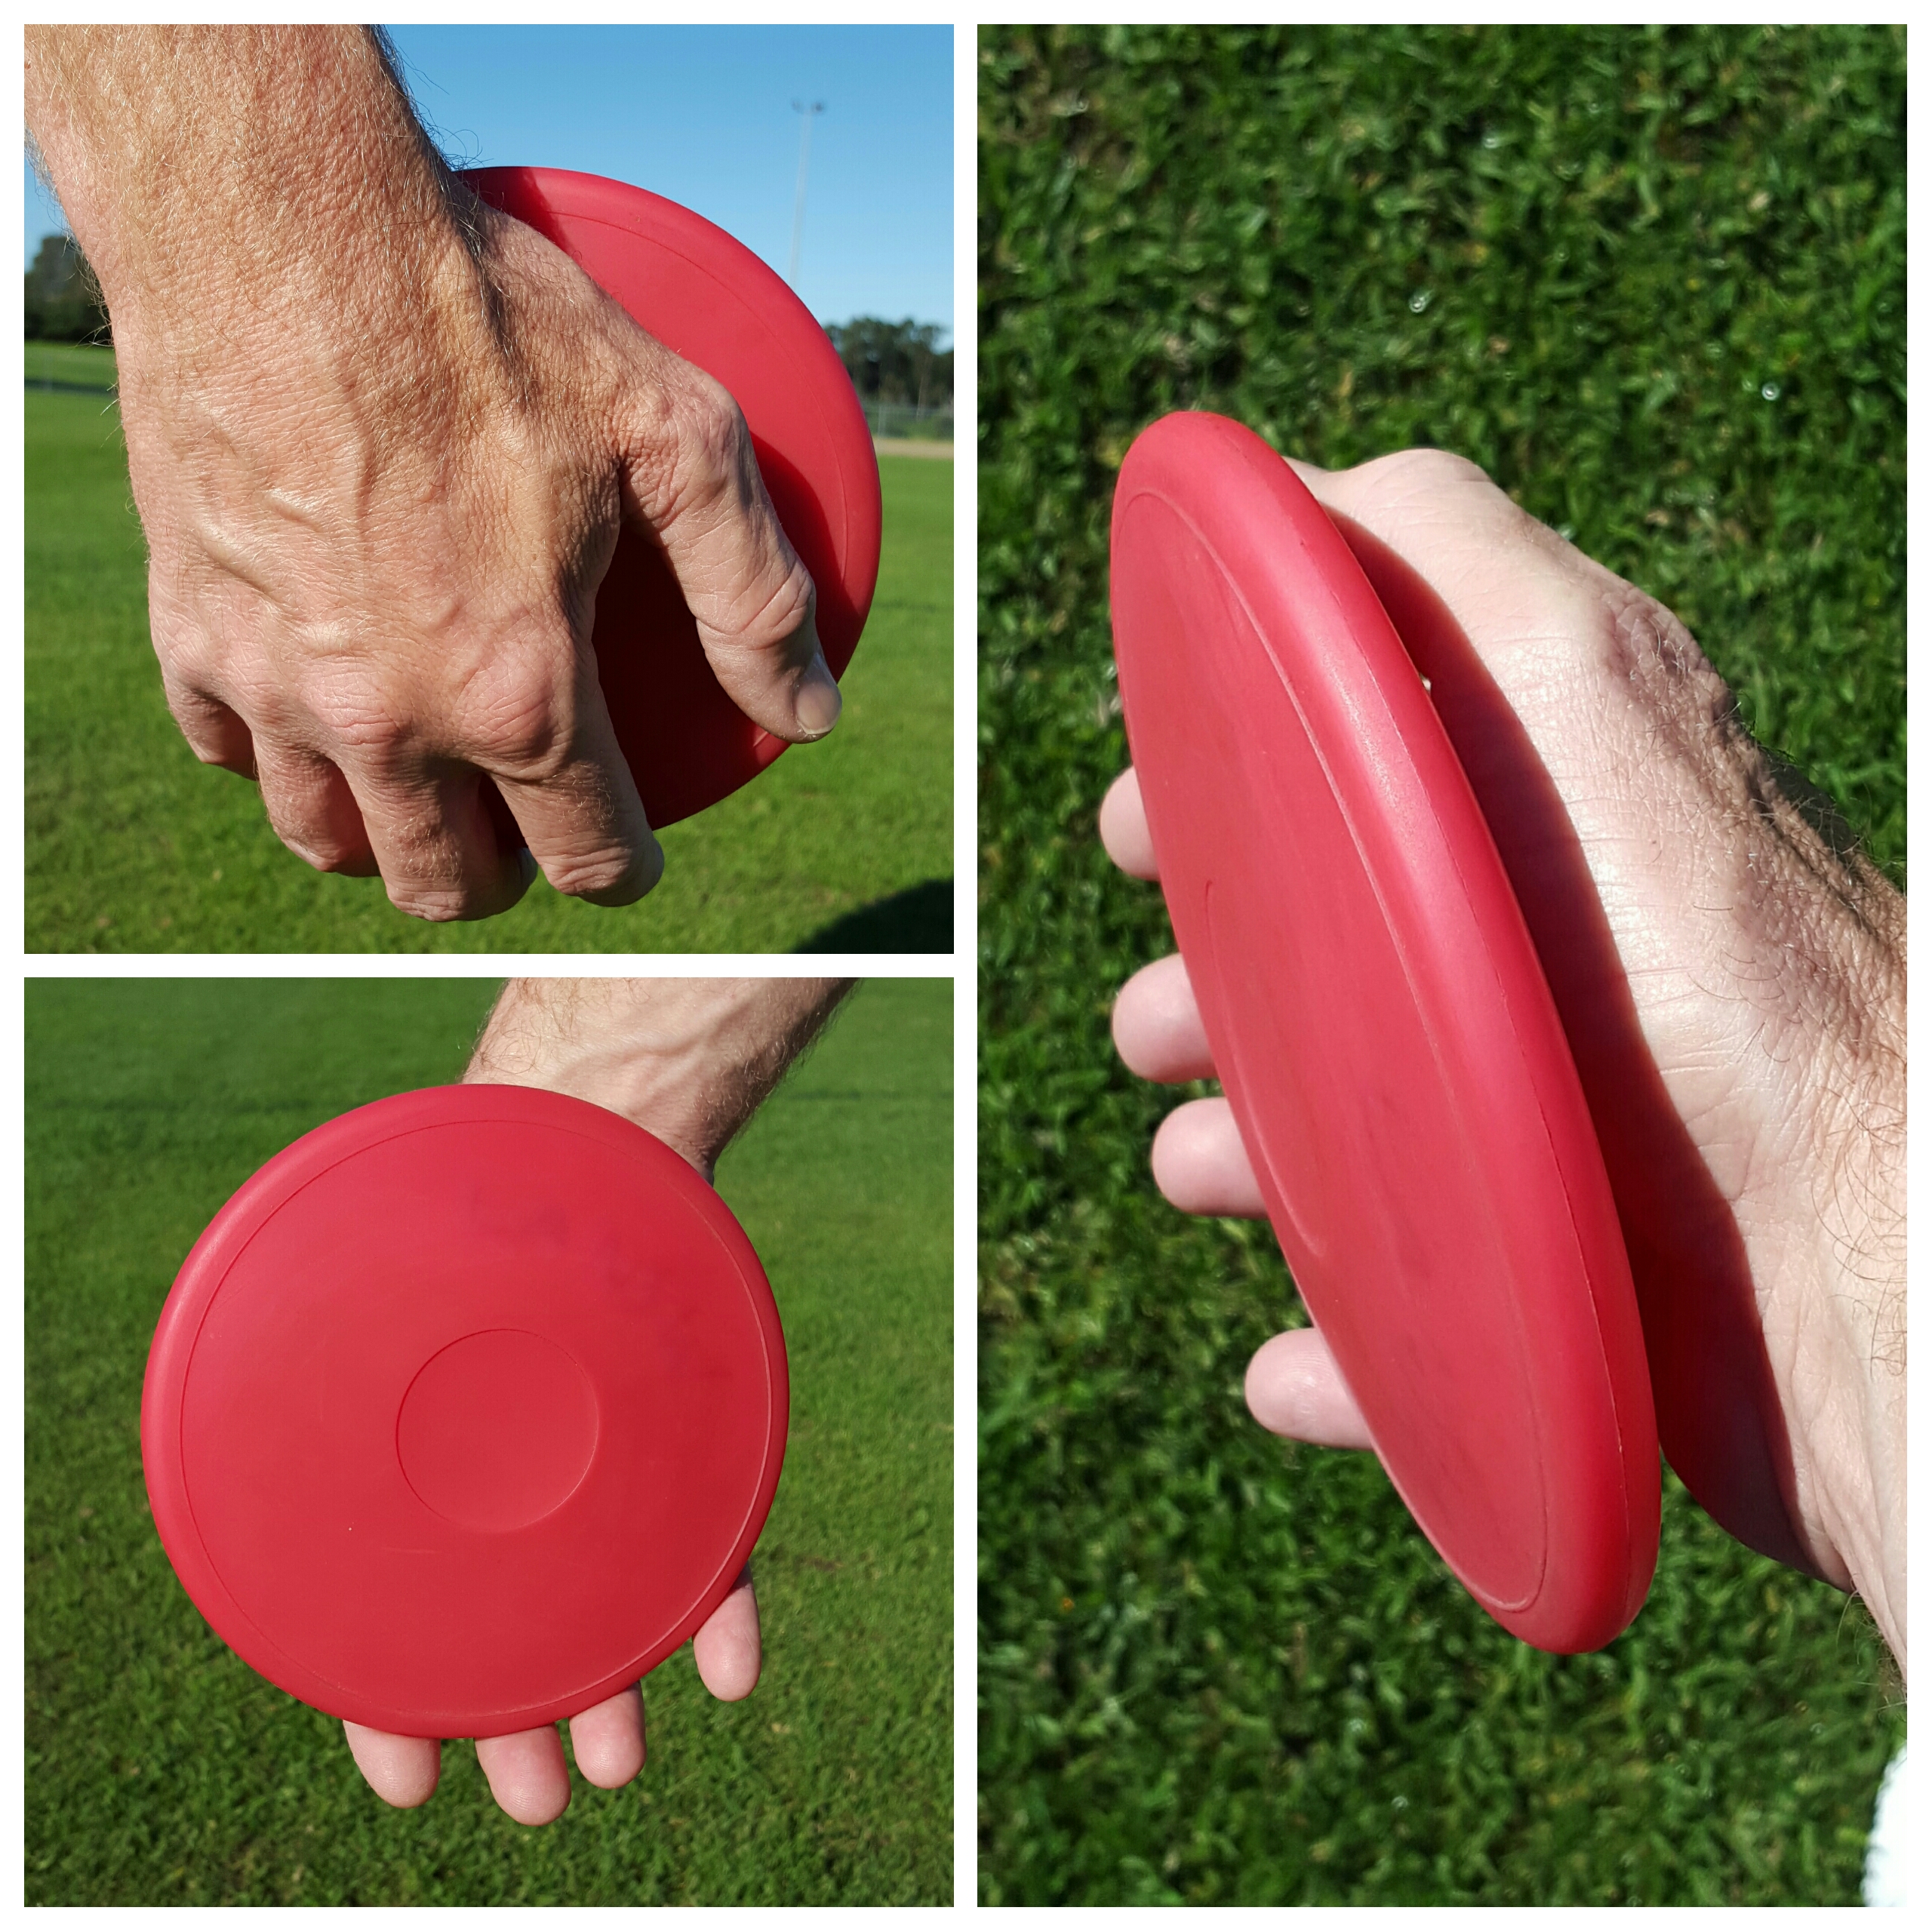
- The discus sits flat against the palm of the throwing hand.
- The edge of the discus sits on the pads of the first joints of the fingers.
- The thumb rests on the back of the discus.
- The discus is held in a loose grip.
The athletes then attempt to grip the discus as they have been taught. Check their grip and provide feedback.
Watch for athletes:
- Who hook their thumb over the edge of the discus.
- Who curl their fingers too far over the edge of the discus (beyond the first finger joints).

- Whose fingers are not over the edge of the discus at all.
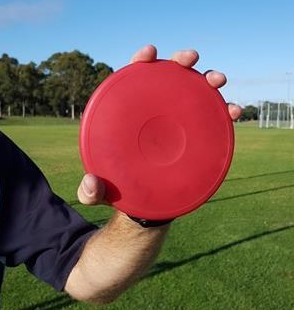
Once the athletes have the grip fundamentally correct, allow them to “feel” an effective grip:
- Instruct them to hold the discus with the correct grip and stand with the implement hanging by their side.
- The discus should be in a vertical position with the palm of their hand facing towards their leg.
- The fingers should be under the discus and their grip should be loose. Allow them to gently swing the discus in a small arc backwards and forwards. (“Tick-tock like a clock”).
- Tell them that they feel the edge of the discus push down, or feel heavy, against their fingers as it swings past their leg.
Step 2
The Release – Discus Waterfalls
Aim
To teach the athletes to release the discus over their index finger.
Activity
Standing with feet parallel, the athletes hold the discus vertically in front of them. using the correct grip

Tipping their hand slightly forward, they let the discus roll over the edge of their index finger and drop from their hand “like water going over the edge of a waterfall”.

The discus should land on its edge in front of the athletes’ feet. Repeat this a number of times.

Watch for athletes who allow the discus to roll out of the back of their hand or tumble the discus over the tops of their fingers. The coach may need to physically move the discus over an athlete’s index finger for them to feel and properly comprehend the correct release action.
Step 3
The Release – Discus Golf
Aim
To practice and learn to control the correct discus release.
Set Up
Place a target, such as a hoop, at an appropriate distance (approx. 5 metres) on the ground in front of the athletes.
Activity
In a skill extension of the “waterfall” drill, the athletes attempt to roll the discus into the hoop to score a “hole in one”. The presence of a target emphasises the the need for a controlled discus release.
- Ensure that the athletes continue to use the correct grip and that they release the discus over their index finger.
- Encourage the athletes to take s step forward with the opposite foot to their throwing hand prior to releasing the implement.
- Ensure that the athletes release the discus close to the ground to prevent the discus from bouncing.
- Watch for athletes who attempt to roll the discus out of the back of their hand.
Repeat this activity several times.
Skill Extension
If time and space allow, the athletes can try to roll the discuses for distance. This skill obviously requires a stronger action and good control if the discus is to cover any great distance.
Step 4
The Release – Discus Underarm Toss to a Target
Aim
To practice and gain confidence in projecting the implement into the air.
Set Up
As above.
Activity
The athletes project the discus with an underarm toss in an attempt to land the implement in a target (such as a hoop) on the full. Repeat as often as time allows and refine the athletes’ technique as required.
- Ensure that the athletes continue to use a correct grip and that they release the discus over their index finger. The discus should spin “away” from the athletes.
- The athletes should attempt to throw the discus so that it spins in an upright position and lands on its edge.
- Tell the athletes that the action is exactly the same as that used to roll the discus but now they are releasing the discus into the air.
- Watch for athletes who attempt to release the discus out of the back of their hand.
Skill Extension
If time and space allows, the athletes can try to toss the discuses to targets set at a greater distance.
Step 5
Slinging Action – Scarecrow Claps
Aim
To teach the slinging arm action and basic feet, leg and torso movements for a standing discus throw.
Activity
This activity is done without holding a discus. Begin by asking the athletes to assume a “ready stance” (i.e. a side-on stance to the throwing direction), standing “like a scarecrow” (i.e. feet shoulder-width apart, arms extended to the sides at shoulder height).

The non-throwing arm is extended towards the throwing direction and the throwing arm is extended back. Leaving their non-throwing arm extended to the front, the athletes swing their throwing arm forward to bring their hands together in a wide, straight-arm clapping action. This mimics the basic discus slinging action.

- Ensure that the non-throwing arm doesn’t move and stays extended.
- The athletes should watch their hands come together as they clap.
Skill Extension
(a) Teach the athletes to swing their hips, torso, shoulders and eyes to the front to accomplish the clap by pivoting their back foot to the front. Telling the athletes that their back foot and belly button should point to the front as they clap is a good cue. The athletes can turn to the side as they swing their extended throwing arm back and pivot to the front as they swing their hand forward to clap. Ensure that the clap is achieved from a “tall” standing position.
(b) Combine the above with teaching a weight shift from the back to the front foot. Demonstrate and teach the movement of “rocking” back onto the back foot as the arm is swung back and “rocking” forward onto the front foot as the body and arm is swung forward to clap.
Step 6
Standing Throw Position – Discus Sandwiches
Aims
- To teach an effective starting position for the standing throw.
- To teach how the discus should be orientated during the preliminary swings and the throwing action.
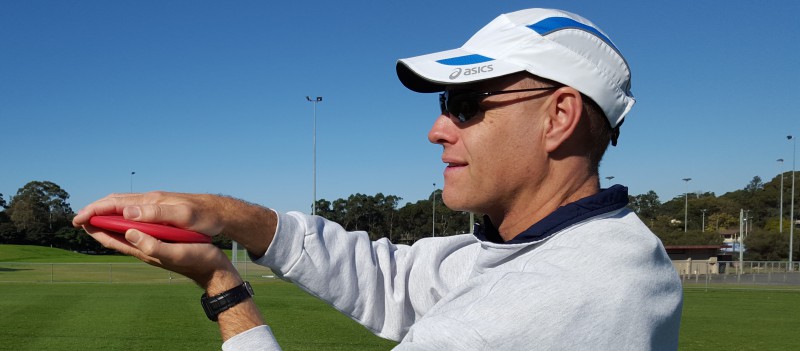
Making a “discus sandwich” is a very simple way to describe an effective starting position for a young discus thrower who is using a standing throw. The “discus sandwich” describes the hand and discus position prior to the beginning of the throwing action. Once taught, the coach can simply tell an athlete or group to “Make a sandwich” as they prepare to throw.
To make the “sandwich”, the athletes stand side-on, looking in the direction of the throw, with their feet in the ready position, the discus held up horizontally in front of the eyes (or near the mouth “ready to eat”).

The throwing hand is on top of the discus, the non-throwing hand underneath the discus to provide support, thus making a “discus sandwich”.
To then teach a simple delivery action without dropping or letting the discus go, the athletes will need to hold the discus in a tight overhand grip (i.e. the “wrong way”). It simply involves “unmaking the sandwich” by swinging the discus back, then swinging their arm forward again the “re-make the sandwich”.
- Encourage the athletes to keep their throwing hands “on top of the discus”. The tight grip on the discus will give the athletes confidence to do this.
- It is common for young athletes to hold their “sandwich” upside down in the ready position. i.e. Throwing hand underneath, non-throwing hand on top. Don’t be surprised if you have to regularly correct young athletes by instructing them to “flip” their “sandwich” over.
Novice discus throwers, not being confident of their ability to grip the discus without the aid of the bottom supporting hand, will often rotate the hand during the forward or backward swings so that the discus becomes vertical or even “upside down”.

This, of course, will not result in the desired discus flight. As a reminder to keep the “sandwich” horizontal, tell the throwers that they risk the ingredients of the sandwich falling on the ground if they hold the discus vertically.
Step 7
Standing Throw – Launching Spaceships
Aim
To achieve a basic standing discus throw with a flat, controlled, accurate discus flight.
Activity
Allow the athletes to attempt an easy standing discus throw, using the correct discus grip learnt earlier. Initially, emphasize achieving a flat, controlled flight of the discus, with the correct release of the discus off the index finger, rather than distance.
The “spaceship” concept is a fun way to describe the desired flight of the discus, with which beginners so often have difficulties.
Tell the group that the discus is a “spaceship”, “flying saucer” or “UFO” and that inside that spaceship are little “space people”, “astronauts” or “aliens”.
Explain that if the spaceship (discus) flies flat, the space people will have a nice, enjoyable, comfortable ride.
Ask the group to imagine what is happening to the poor people inside the spaceship if it is fluttering, wobbling or flipping end-over-end as it moves through the air (the result achieved by many beginner discus throwers!). After a few laughs, the answers from the athletes usually include that the space people will fall out of their seats, hit their heads on the roof, etc.
Also tell the group that the space people much prefer a smooth landing (sliding flat to a stop) rather than a crash landing on the edge or roof of their spaceship.
Asking young athletes to try to give their “space people” a smooth ride can set the athletes an enjoyable challenge and give them a bit of a laugh as they imagine what is happening inside the “spaceship” when their throw doesn’t quite result in the discus flight intended!
- Remind the athletes to begin with the discus/spaceship in a “sandwich” position.
- Explain that the hand should be over the top of the discus and the palm should be facing down as the discus is released.
- Watch for those not confident in the grip or release which may result in the athlete trying to release the discus with the hand underneath the implement and/or the athlete using a tight, claw-like grip on the discus with the thumb over the edge.
- Watch for athletes who release the discus out of the back of the hand. It may help to teach the athletes that a discus should spin clockwise for a right-hander and anti-clockwise for a left-hander. If all else fails, the coach may need to hold the discus in the athlete’s hand and slowly guide the hand and discus through the correct index finger release.
Skill Extension
Add a game and a fun competitive element by placing ground markers at 5 metre intervals (up to 20 metres) in front of the throwers. The athletes throw the discus to score points awarded for where the discus lands and how it flies:
- 1 to 5 metres = 0 points
- 5 to 10 meters = 1 point
- 10 to 15 meters = 2 points
- 15 to 20 metres = 3 points
- 20 meters plus = 4 points
Award a bonus point for a flat discus flight, regardless of where the discus lands. The maximum score for a throw is therefore 5 points.
Summary
- Grip
- Discus Waterfalls
- Discus Golf
- Underarm Toss to a Target
- Scarecrow Claps
- Discus Sandwiches
- Launching Spaceships
Conclusion
It is possible to teach young athletes to perform a basic standing discus throw and achieve a flat discus flight within a thirty to forty minute coaching session. The key is to focus on instilling the correct discus grip and release, a “sandwich” starting point and a “palm down” delivery.
This article has been adapted and updated from an article by the author that first appeared in “Modern Athlete and Coach”, Volume 48, No. 1, January 2010
Further reading
Get The E-Book Version Of This Post Including A Bonus Cheat Sheet
Articles:
5 Tips for Teaching Discus to Beginners
10 Biggest Mistakes Young Athletes Make When Throwing a Discus
How to Solve the Problem of an Early Discus Release
Why It Is Better to Release the Discus Out of the Front of the Hand
When Should a Child Start to “Spin” in the Discus?
Should Kids “Step” Across the Ring in the Discus?
Games That Kids Love: Discus Train Tracks
If this post helped you please take a moment to help others by sharing it on social media. If you want to learn more I encourage you to leave questions and comments or contact me directly.

Darren Wensor is a sports development professional, coach educator, specialist coach of young athletes, and founder of the blog coachingyoungathletes.com. Learn more about him here and connect with him on Twitter, Facebook, Linkedin, or via email. Check out Coaching Young Athletes on YouTube, the Coaching Young Athletes podcast, and the Coaching Young Athletes E-Book Series.
