Coach Young Athletes to Pass a Relay Baton in 4 Simple Steps
In this article I outline the process that I use in schools and at coaching clinics to teach groups of young athletes how to exchange a relay baton through a changeover zone.
One coaching session will usually not result in a “textbook” technique, but can produce athletes who at least possess the minimum skills and understanding required to participate safely in the event.
I am often presented with a group of up to thirty young athletes who I am expected to take from a beginner to a working model within 30-40 minutes. This requires coaching with clarity, being well-organised and succinct, and being able to separate the ‘need-to-knows’ from the ‘nice-to-knows’.
The steps that I use are not the only way in which the skills can be taught but have been developed through lots of trial and error and have consistently proven effective for me.
Group Organization
- The following outline assumes that the coach is working with a group of up to thirty young athletes. The activities could be adapted for much smaller groups.
- The activities have been used in numerous school coaching clinics with athletes aged 9 – 17 years of age.
- The outline assumes that the coach is working on a large grassed area, however the activities can be adapted to the area available to the coach. All activities could be adapted to a laned athletics track.
- I suggest that ideally the coach uses one relay baton between two athletes (i.e. 15 relay batons for a group of 30 athletes) however this amount of equipment may not be available to a coach and is not a necessity. Athletes/groups can share relay batons if required. The coach, however, should use as many relay batons as are available so that the athletes remain as active as possible and therefore are engaged in the session.
- When the athletes are working in pairs, multiple pairs can be active at once, according to the number of relay batons that the coach has available.
- For all activities, ensure that there is adequate space between each line or pair in order to avoid interference/collisions.
- If time allows, throughout the session, encourage the athletes to work with a variety of partners.
- The outline assumes that the coach has already conducted a group warm up game/activity.
Step 1:
Introduction of the basic baton passing technique.
Activity:
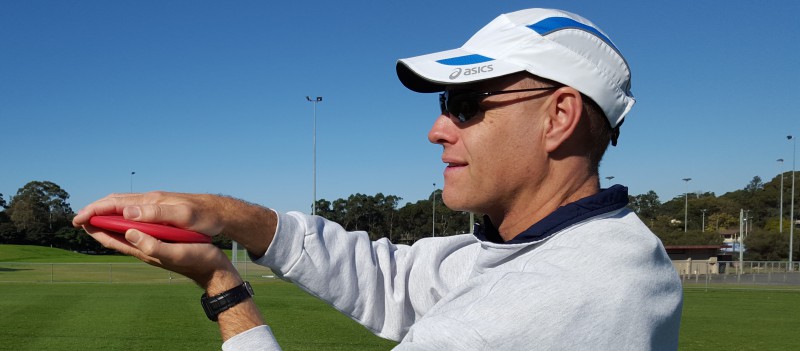
With the assistance of an athlete, demonstrate a basic (stationary) baton pass in front of the group.
NOTE: I tend to use the downward baton pass method with kids.
Emphasize:
- The receiver extends their hand behind them at just below shoulder height with their palm up, hand flat, fingers together, thumb out to the side, arm and hand still; eyes to the front.
- The end of the baton is placed into the receiver’s hand using a downward motion.
- It is the responsibility of the incoming runner to control the pass and place the baton into the receiver’s hand.
- The pass occurs between athletes using alternate hands i.e. right to left, or left to right.
Step 2:
Rehearsal of a basic baton pass.
Aim:
Relay baton passing development.
Set-Up:
Divide the group into even teams of 5-6 athletes. The athletes line up behind a ground marker in their teams, standing in single file, an arm’s length apart. The person at the rear is given the relay baton.
Activity:
Use the activity “Link Up” – The athletes practice passing the baton up and down their line.
Emphasize:
- The non-visual pass – the receiver’s eyes should remain to the front.
- The receiving hand is held steady.
- The baton is placed firmly into the receiver’s hand. (But not too firmly!)
- The use of alternate hands during the pass.
HINT: When the baton gets to the front, simply ask everyone to turn and face the other way. The relay baton is now at the rear of the line and the drill is repeated.
Skill Extension:
Play the game “Fast Baton” – Keep the same formation as above. On “Go” the athletes pass the relay baton down the line as quickly as possible, using non-visual exchanges. When the person at the front of the line receives the baton, they must quickly raise it above their head, signaling that the team has finished. The first team to finish is the winner of that round.
Step 3:
Passing the baton through a changeover zone
Aim:
- Development of running through the changeover zone.
- Teach the athletes the principles of passing the baton through a changeover zone.
Set Up:
Set up a large square or rectangular 30m “changeover zone” with ground markers. In pairs, the athletes decide who will be the incoming runner and who will be the outgoing runner. They also need to decide in which hand the incoming runner will carry the baton and therefore which hand the outgoing runner will use to receive the baton. The incoming runners stand about 20m back from the changeover zone. The outgoing runners stand five normal walking paces inside the beginning of the changeover zone, looking back over their shoulder at their incoming runner.
Activity:
On “Go”, the incoming runners run at speed towards the outgoing runners. As soon as an incoming runner reaches the beginning of the changeover zone, the corresponding outgoing runner must turn and run at speed towards the end of the 30m changeover zone with their receiving hand extended.* The incoming runner aims to place the baton into the outgoing runner’s hand before the outgoing runner reaches the end of the changeover zone. Repeat this activity as much as time allows.
*I use this method with all novice relay runners avoiding the need for the incoming runner to call for the extension of the outgoing runner’s receiving hand.
Emphasize:
- The outgoing runner must turn and run – hand extended and steady – as the incoming runner hits check mark.
- The outgoing runner should be running as they receive the baton. They should not remain stationary until they receive the baton.
- The outgoing runner should avoid looking behind or grabbing at the baton during the pass.
NOTE:
- Ensure each athlete experiences being in the role of an incoming and outgoing runner i.e. passing and receiving the baton.
- Once the athletes start to gain an understanding of using the changeover zone, the outgoing runners can be taught to adjust their starting point (i.e. the five steps inside the beginning of the changeover zone) in consultation with the incoming runner, in order to promote a smooth baton change.
- If space does not permit a 30m changeover zone or a 20m run-in, shortening the areas will not overly affect the activity.
Step 4:
Competitive passing through the changeover zone.
Aim:
Development of running fast though a changeover zone
Set Up:
Again, use a large 30m “changeover zone” designated by ground markers.
Activity 1 – Relay Zone Racing:
With athletes again working in pairs they decide who will be the incoming and outgoing runners. The outgoing runners can stand anywhere inside the 30m changeover zone, however all incoming runners must all begin running from the same point back from the changeover zone (e.g. 20m). Each incoming runner carries a baton.
The aim of this game is for each pair to attempt to be the first to carry the baton past the end of the 30m changeover zone. On “go”, all incoming runners sprint towards the outgoing runners in an attempt to make a fast, smooth baton exchange in the 30m changeover zone. The outgoing runner, on receiving the baton, sprints to the end of the changeover zone, carrying the baton.
Activity 2 – Relay “World” Record
Using the same set-up as above, pairs compete for a group or “world” record for being the fastest at passing the baton through the 20m changeover zone. The coach uses a stopwatch the time the movement of the baton through the zone. The timing should begin as the incoming runner enters the 20m changeover zone, and stopped when the outgoing runner leaves the zone. The pair with the fastest time holds the “world record”.
NOTE: Only one pair can usually be timed at once. Have pairs ready to go as soon as the previous pair has finished. Alternatively, organise multiple timers so that more than one pair can run at once.
Emphasize:
- Changing the baton at speed. (This activity is one of the best that I have used to develop in young athletes an understanding and appreciation of the concept of exchanging a baton at speed. It catches on pretty quickly amongst the group that the best times are being achieved by the athletes who demonstrate the skills that the coach has been emphasising).
It is possible to teach a basic relay baton exchange through a changeover zone in a 30-40 minute lesson. The aim is not to achieve technically perfect passes but to see the athletes by the end of the session beginning to grasp the basic principles and skills required.
This article has been adapted and updated from an article by the author that first appeared in “Modern Athlete and Coach”, Volume 53, No. 1, January 2015.
References
The above activities can be found in the book “Great Ideas for Group Games” and the Little Athletics Australia LAPS (Little Athletics Program for Schools) Manual.
If this post helped you please take a moment to help others by sharing it on social media. If you want to learn more I encourage you to leave questions and comments or contact me directly.

Darren Wensor is a sports development professional, coach educator, specialist coach of young athletes, and founder of the blog coachingyoungathletes.com. Learn more about him here and connect with him on Twitter, Facebook, Linkedin, or via email. Check out Coaching Young Athletes on YouTube, the Coaching Young Athletes podcast, and the Coaching Young Athletes E-Book Series.
