Coach Young Athletes to Scissor High Jump in Three Easy Steps
The following sequence of activities can be used to teach a basic, safe, working model scissors high jump technique to beginners.
I have used these teaching steps with class-size groups of up to thirty children within a thirty minute session at schools and with smaller groups during coaching clinics. The skills featured are generally applicable to 8-12 year-olds.
Organizational Issues
Teaching high jump to a group presents a number of organizational problems for the coach:
- High Jump is potentially low in activity time due to one piece of equipment (bar and landing mats) that must be shared among the entire group. Thus the coach must look for ways to keep the group as active as possible and allow each athlete as many jumps as possible in the time available.
- A group of youngsters will display a vast array of physical sizes and abilities, thus exactly at what height to place the high jump bar to suit everyone is problematic.
- The coach has little chance of helping each of the athletes to work out individual run ups, apart from which side of the bar they will run in from. It is for this reason that I simply put a marker on the ground that will generally suit most of the group and ask all athletes to line up behind it and make small adjustments as required when it is their turn.
The Bar
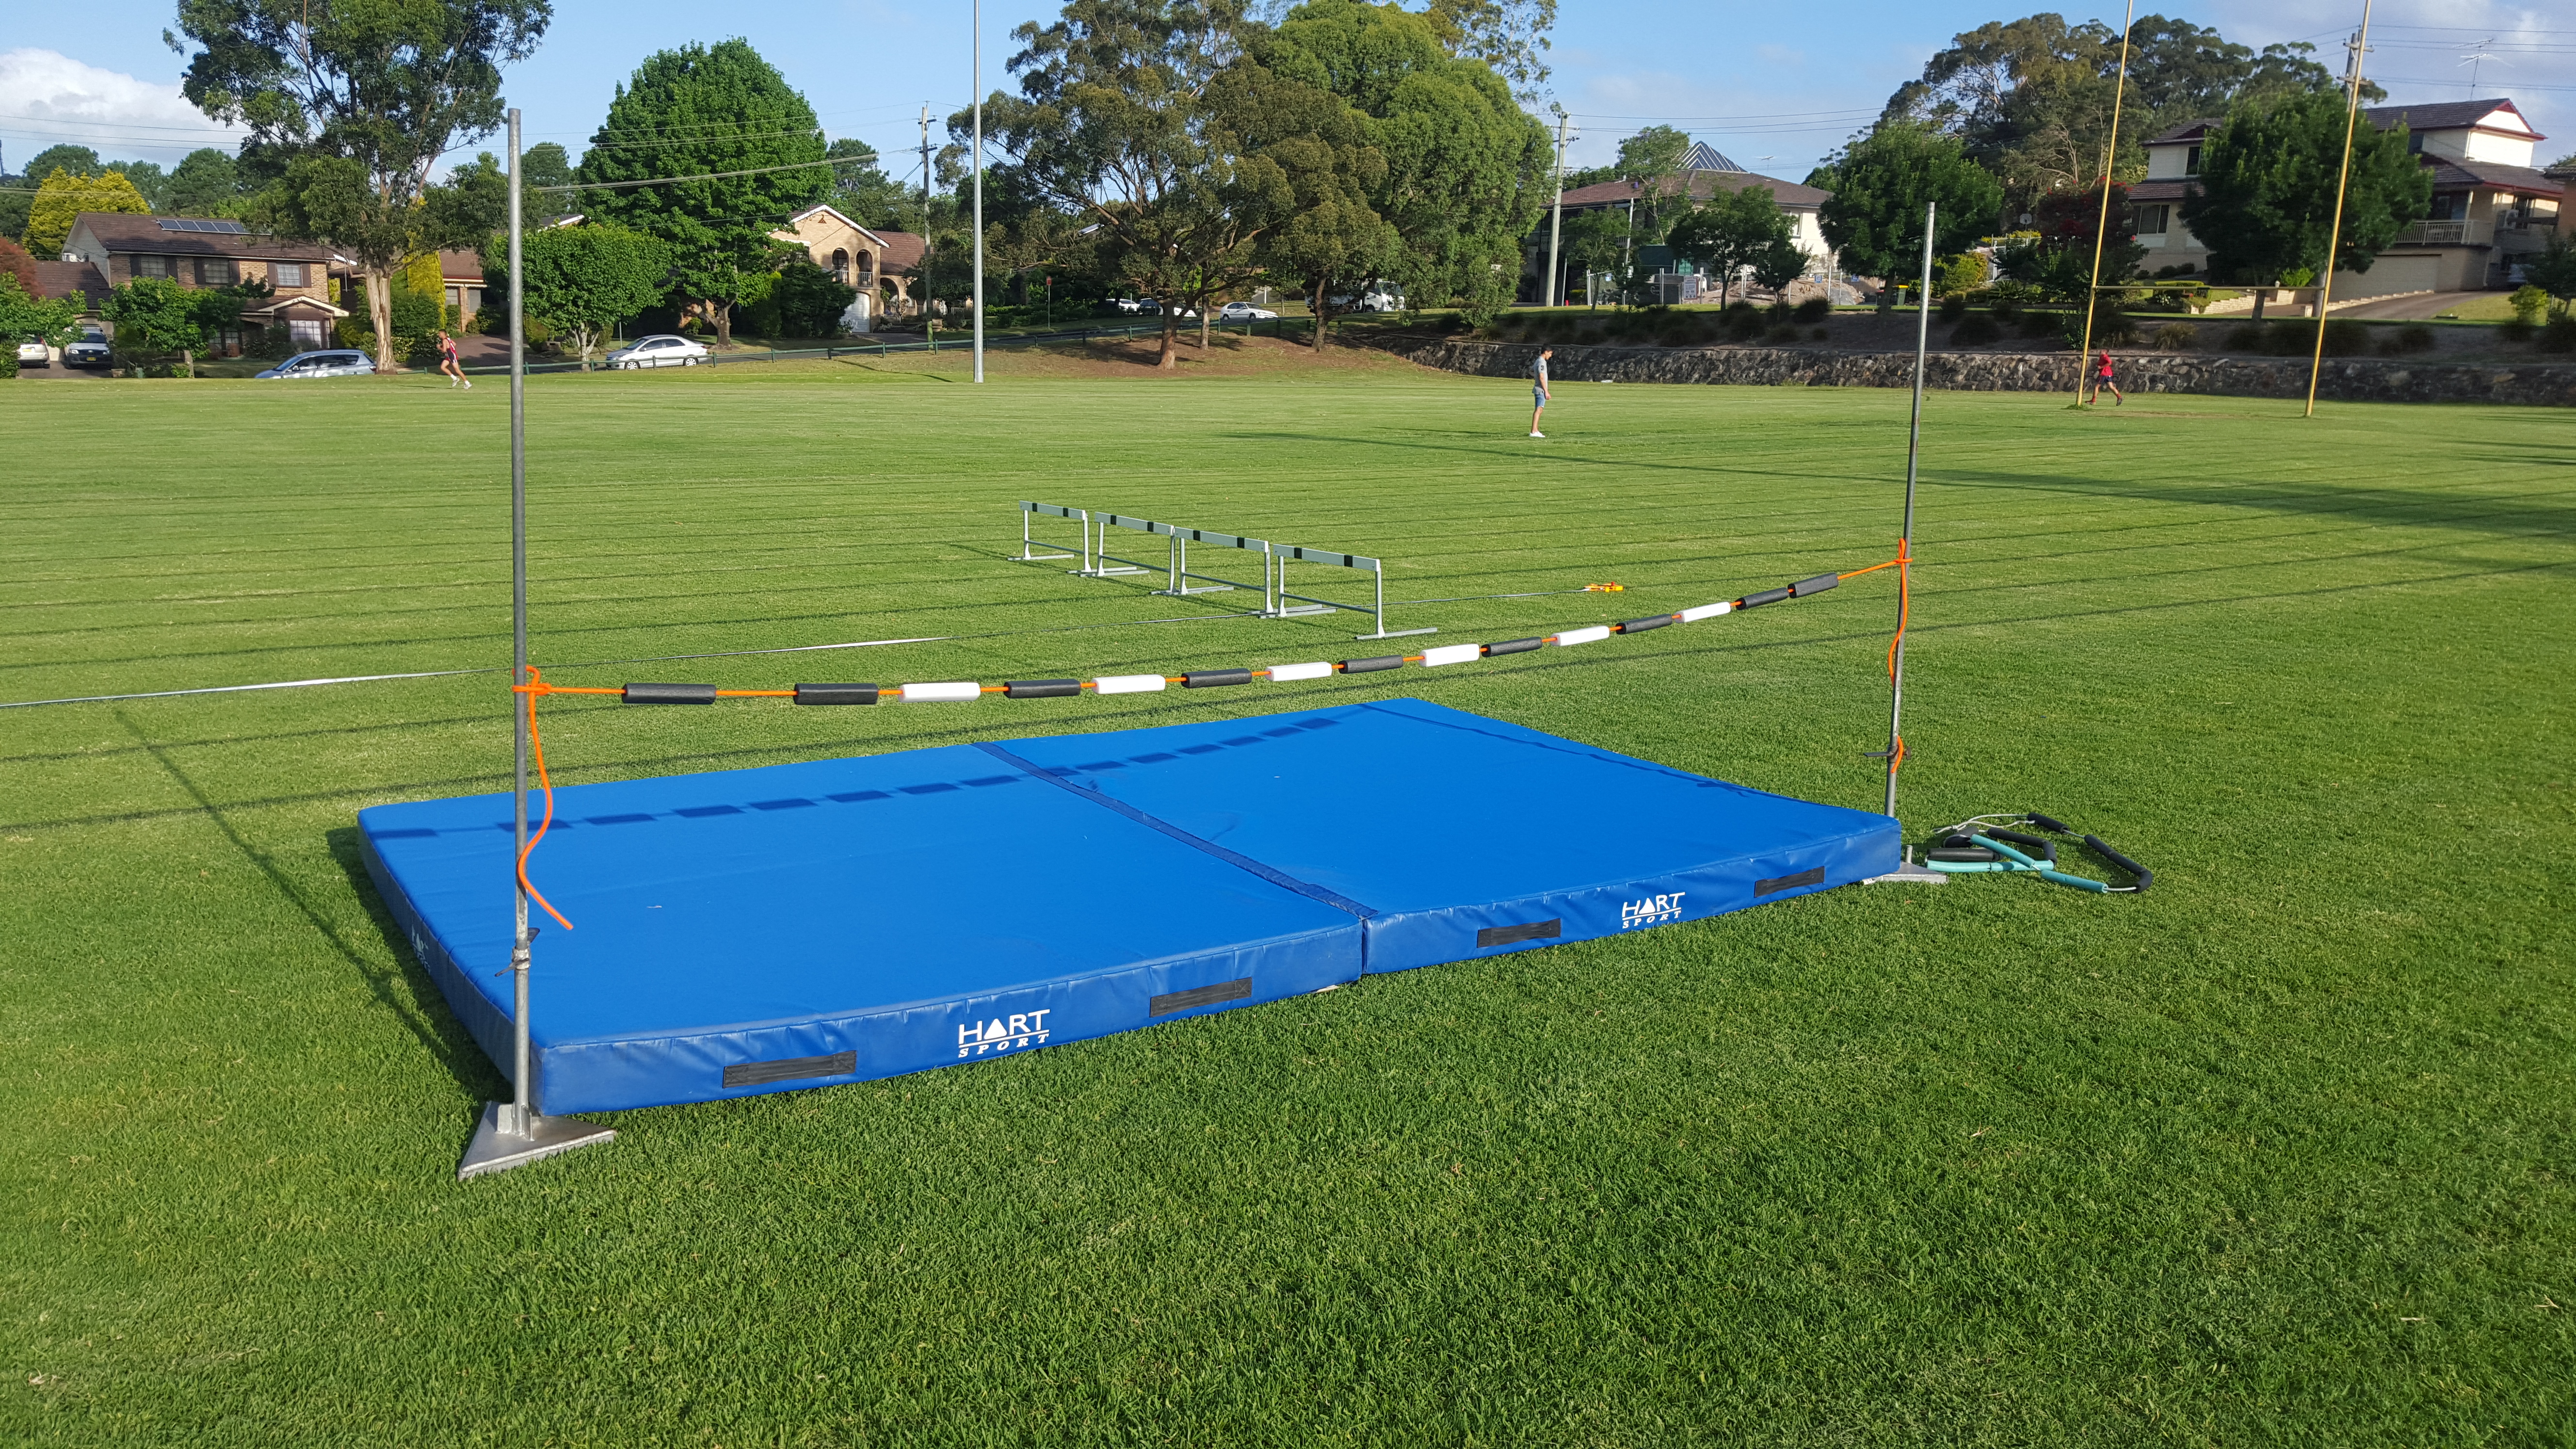
When teaching high jump to large groups of beginners I ALWAYS use a flexible elastic training bar. It is far less confronting to novices than the fibre glass bar and has the advantage of being quick and easy to adjust in height on the uprights. As it is looped around each upright the coach does not have the problem of wasting time by continuously having to pick up and re-set the bar. The coach, however, must be aware that an elastic bar, if it is landed upon by an athlete, has the potential to pull down unstable uprights. It is for this reason that I anchor the base of the uprights under the high jump mats to stabilize them.
The Teaching Steps
Step 1:
Run and leap onto the mats – no high jump bar.
Aim:
- To give the athletes confidence in leaping up onto the mat.
- To develop a basic scissors take-off.
- To determine the preferred take-off leg.
- To develop a feet-first landing position.
Set Up:
The athletes line up at 90 degrees and approximately 10m from the high jump mats. No high jump bar is used. Either the higher or lower scissor-style mats can be used for this activity.
Activity:
The athletes run in a controlled manner directly at the mats and, taking off from one foot, leap up onto the mat to land on the other foot. The athlete’s forward momentum may see them take several steps forward on the mats after landing.
- Ensure that the athlete takes off from one foot and lands on the other foot before the take off foot is also brought down for balance.
- Ensure an upright (i.e. on feet) landing position up on the mats.
- Make sure that athletes don’t slow down or stop before taking off. It is a continuous, flowing action.
- Instruct the athletes to come to a stop on top of the mats and then, if using the higher style mats, carefully climb down.
It may help to tell that athletes that the action is a “step” up onto the mats. Asking the athletes to “spring” or “pop” up onto the mats can also be useful.
NOTE:
- With a large group, it is worthwhile to organize this activity so that two to three athletes are active at once, which cuts the waiting time. Depending on the size of your landing area, split the group into two or three lines side-by-side and several metres apart, facing the mats. This will allow more than one athlete to run in and jump at a time. This can be done very safely if you clearly indicate that the athletes MUST land on their area of the mat. This can be further emphasized by dividing the runway with ground markers and the landing area with elastic bars, skipping ropes, etc.
- Ensure that the athletes do not commence their run in until you have given the signal.
- Try to keep the group moving through quickly, but make sure that the mats are clear before you give the signal for the next athletes to have their turn.
Skill Extensions:
Once you can see that the athletes have confidence in leaping up onto the mats, gradually introduce the following technical points.
- A “tall” take off position. The head should be up, eyes looking forward.
- A high lead knee drive on take-off.
- A quick last two steps on take-off. (I have been amazed to see even some eight-year-olds grasp this concept).
- Encourage the athletes to attain more height and time in the air by directing them to try to “float” or “freeze” in the air after take-off.
- Ask the athletes to note which is their preferred take-off foot.
Step 2:
Scissors onto mats – no bar
Aim:
To introduce the basic scissors high jump action from an angled approach.
Set Up:
The athletes move to either the left or right-hand side of the mats according to their preferred take-off leg (left-hand side for right foot take-off; right-hand side for left foot take-off) and line up behind a ground marker approximately 8-10 metres back from the mats and at a 35 degree angle to the front of the mat.
Activity:
One at a time the athletes run in towards the mats and attempt to scissor up onto the mats, landing in an upright, standing position.
- Tell the athletes that they are performing the same skill as before, the only difference is the angled approach to the mats.
- Ensure that the athletes use the correct take-off foot according to the side that they are running in from. Tell the athletes that the leg closest to the mats drives up first. Allow the athletes to change sides if needed.
- Watch for those athletes who run straight at the mats (as in the first activity). It can help to ask the athletes to aim for the far back corner of the mat when running in and taking off or to ensure that their inside shoulder is alongside the mat at take off.
- Encourage an accelerating run up to the mats. Watch for those athletes who use a one-paced run up.
- Continue to encourage a quick last two steps.
- Encourage a driving up of the knee on take-off, rather than driving the foot up with a straight leg.
- Emphasize landing in a standing position.
- Talk to the athletes about aiming to land safely in the centre of the mats. Indicate, or even mark, a preferred take off area that will ensure that the participants will land safely on the mats. Encourage the athletes to abort attempts that do not bring them into this take off area.
Step 3:
Scissors onto mats – over an elastic bar
Aim:
To allow athletes to attempt the scissors action for height.
Set Up:
As above, with the addition of a flexi bar.
Activity:
One at a time, the athletes run in towards the mats and attempt to scissor up over the flexi bar and onto the mats, landing in an upright, standing position.
- To begin with, the elastic bar may simply be looped over the uprights and lie on top of the edge of the mat, so that all athletes enjoy the feeling of jumping “over” an object without the skill becoming too confronting.
- Continue to reinforce all of the coaching points outlined for the previous activity.
- Watch for the athletes who have a “lazy” take-off foot when clearing the bar; they drive their lead knee and foot over the bar but do little with the other leg, often leading to it knocking the bar. Instruct these athletes that they also need to drive the knee and foot of the take-off leg up and over the bar. This can often be taught away from the mats by asking the athlete/s to begin standing with their hands held at hip height out in front of them with palms facing down. Then instruct them to leap vertically into the air to contact their hands with firstly their lead knee, then their other knee before landing on the ground, one foot after the other to mimic the scissors action.
Skill extensions:
- As the athletes become more competent, gradually increase the height of the flexi bar, allowing longer run-ups as required.
Issues
In a group situation, it will probably get to the point where the bar height will be too high for some and not challenging enough for others. There are several solutions to this so that the athletes can all continue to participate at their own level:
Solution 1:
Ask each athlete before their turn to provide guidance as to the height of bar they wish to attempt. With the assistance of another adult, or one of the athletes, it is easy to slide an elastic bar up and down the uprights to set the bar where the athlete wants it.
Solution 2:
Mark the uprights with three different coloured pieces of tape, ribbon, etc. The lowest piece of tape is placed at a height that is achievable for all athletes. The other pieces are placed at heights of increasing difficulty. Ask the athletes to nominate the colour they wish to attempt and quickly slide the flexi bar to that colour/height.
Always have a spare colour in store to put at an even more difficult height for those athletes who are comfortably achieving the top height and wish to further challenge themselves.
Games:
Add a fun game and competitive element by awarding points or “labels” according to the height jumped. E.g:
- Lowest height = 1 point
- Middle height = 2 points
- Top height = 3 points
- Miss, regardless of height = 0 points
OR
- Lowest height = “Legend”
- Middle height = “Super Legend”
- Top height = “Master Legend”
Another great high jump game that you may like to use some time is Escape from the Space Monsters.
It is possible to teach young athletes to perform a basic scissors high jump within one session. The key is to focus on very simple, non-threatening teaching progressions, while keeping the athletes engaged and happy.
Do you have any tips for teaching kids a scissors high jump?
I would love to hear what has worked for you. Let me know if you try some of the tips that I have given above, and I am also happy to answer any questions that you have.
This article has been adapted from an article by the author that first appeared in “Modern Athlete and Coach”, Volume 48, No. 2, April 2010
Further reading
High Jump: Don’t Cut Out the Scissors
10 Biggest Mistakes Young Athletes Make When They Scissors High Jump
If this post helped you please take a moment to help others by sharing it on social media. If you want to learn more I encourage you to leave questions and comments or contact me directly.

Darren Wensor is a sports development professional, coach educator, specialist coach of young athletes, and founder of the blog coachingyoungathletes.com. Learn more about him here and connect with him on Twitter, Facebook, Linkedin, or via email. Check out Coaching Young Athletes on YouTube, the Coaching Young Athletes podcast, and the Coaching Young Athletes E-Book Series.

[…] How to Teach Scissors High Jump to Young Athletes […]
LikeLike