3 Top Tips For Each Little Athletics Event
Are you new to Little Athletics or youth track & field? If so, I am hopefully going to help make your athletics initiation that little bit easier.
Below are some tips for a range of athletics events or skills. Each tip reflects either a question that I am commonly asked or corrects a misunderstanding that I regularly see.
Many of the tips include clickable links, which will lead you to more information.
Running
- The commands for a sprint race are “On Your Marks”, “Set”, then the gun fires. There is no “Set” command for any race longer than 400m; just “On Your marks” then the gun.
- How to best hold the hands when running? Loosely closed; not squeezed shut and not open and rigid.
- Encourage kids to keep running until they are a good few metres beyond the finish line.
Starting
- Which foot to put forward at the start line? Whichever feels best for the athlete.
- In the standing start “Set” position, stand with the opposite arm and leg forward.
- Once in “Set” and waiting for the gun, look down at the ground, not at the finish line.
Hurdles
- The leg that clears the hurdle first is referred to the lead leg. The other leg is referred to as the trail leg.
- If a young athlete is constantly hesitating to the first hurdle, tell them to swap which leg is forward at the start line
- Accidentally knocking hurdles over does not disqualify an athlete, regardless of the number of hurdles knocked down. Deliberately knocking a hurdle down results in disqualification.
Race Walking
- In race walking the hips don’t “wiggle” from side-to-side, they rotate forwards and backwards around the vertical axis to assist with an athlete’s stride length.
- The foot should strike the the ground with the heel; the toes are pulled up towards the shins.
- There should be no “flight phase” as there is in running; one foot is always in contact with the ground, according to the judges eye at the time of the race. Photos or video viewed after the event are irrelevant in the judging of the event.
High Jump Scissors
- Use a straight run in of 8-10 strides angled towards the far back corner of the landing mats; there is no curve in a scissors run-up.
- The leg closest to the bar is driven up and over the bar first.
- The feet need to be the first part of the body to land on the mat.
High Jump Flop
- A flop high jump run-up follows a J curve shape of 8-10 strides.
- A two-foot take-off is not allowed.
- An athlete should work on leaning away from the bar on take off. Avoid leaning into the bar.
Long Jump
- The athlete must take off from one foot and ideally land with both feet at the same time. It is a one foot to two foot jump.
- After landing, an athlete should walk forwards out of the pit. Walking back through the pit can result in a foul.
- The jump is measured to the mark in the sand pit that the athlete has made that is closet to the point of take off.
Triple Jump
- The triple jump consists of a hop, step, jump sequence. For ease of understanding, think of it as landing on the same foot, the other foot, then both feet.
- The distance measured is the entire distance covered – from the hop take-off to the jump landing.
- If an athlete lands the jump on the runway (i.e. doesn’t make the pit) it is a foul.
Shot Put
- Preferably hold the shot on the base of the fingers; keep it off the palm.
- Tuck the shot under the jaw, against the neck, near the windpipe. Not up on the cheek or behind the ear.
- Keep the elbow of the throwing arm up BEHIND the shot both prior to and during the putting action.
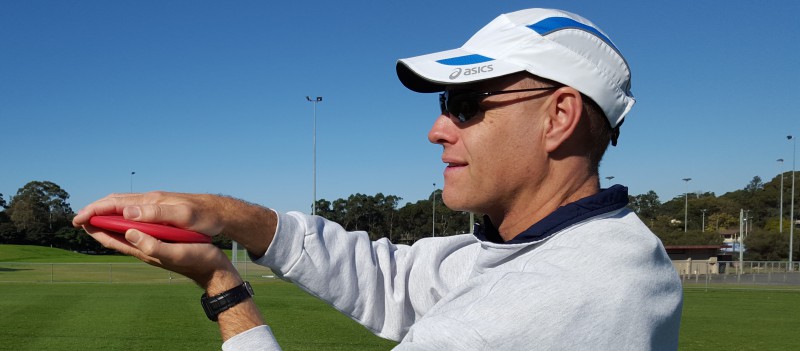
Discus
- Athletes should avoid hooking the thumb over the edge of the discus when gripping it.
- The best way to release the discus is out of the front of the hand, over the index finger.
- The throw is measured to where the discus first hits the ground, not to where it rolls.
Javelin
- When throwing or preparing to throw, keep the point of the javelin in the direction of the throw.
- The javelin throwing action resembles an overarm throwing action, not a straight arm bowling action.
- The javelin does not have to stick into the ground to be a fair throw; it is a fair throw as long as the javelin’s metal head strikes the ground first.
Do You Have Any Other Questions?
You can ask a question or seek a clarification by leaving a comment/reply or by using the below contact details.
Further reading
Coaching Young Athletes E-Book Series
If this post helped you please take a moment to help others by sharing it on social media. If you want to learn more I encourage you to leave questions and comments or contact me directly.

Darren Wensor is a sports development professional, coach educator, specialist coach of young athletes, and founder of the blog coachingyoungathletes.com. Learn more about him here and connect with him on Twitter, Facebook, Linkedin, or via email. Check out Coaching Young Athletes on YouTube, the Coaching Young Athletes podcast, and the Coaching Young Athletes E-Book Series.
